A Motion Menu is a Menu where the background is a Video stream (hence Motion) instead of a still background image. You can also add sound to a Menu as background audio, which may or may not match the video.
This feature allows you to create very sophisticated Motion Menus with the right video editor. You can also use the DVD-lab built-in Render Motion tool.
DVD-lab doesn't by default, mix the Motion background with the buttons you put on top of it, as DVD-lab has no built-in encoder. These buttons will be used for the Highlighted image (subpicture) and they will be not visible in a normal Menu. You can however let DVD-lab render the Menu which will mix any Motion objects (backgrounds, video thumbnails) with all other objects.
Basically, you are responsible for how and in what way you create the video background. This will give you a lot of freedom, it depends on you and the application you use to create the video background. DVD-lab doesn't restrict you to do only one type of Motion Menu, nor does it force you to use the built-in Render Motion tool.
Once you have built your video background, import it into your Assets bin, then in DVD-lab you can easily create the highlighted text, frame or rectangle part objects and create links on top of them.
![]() A Very Simple Motion Menu
A Very Simple Motion Menu
You can create a very simple "Motion Menu" directly in DVD-lab, without another video application, by replacing the Menu background still image with a short video clip. You will use the "Normal" subpicture properties to show an subpicture in normal state, which will then be shown in a different color for the highlighted state.
1. Create a new, blank Menu. Then add two text objects and create links from each (Just drop a Movie or Menu from the Project tree onto the text object). Something like this:.
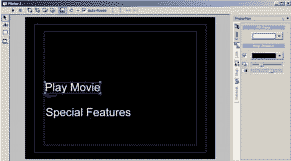
2. Import a short video which you would like to use as background video into the Assets bin.
3. Drag the video background from the Assets bin and drop it onto this Menu. DVD-lab presents this message:
As the message indicates, it is a good idea to make the video background one of the first things added to a new menu to avoid losing any Normal State design objects the Motion Menu would replace. The Menu now looks something like this:
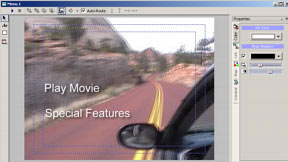
4. Click Simulation

5. The white text will disappear and you will see just the first text object highlighted. Go to the Properties pane (on the right) and select Map. Switch the State slider from Selected to Normal. Since you are using Group 3 for both text objects, move the third slider all the way to right and optionally pick some other color via the color box.
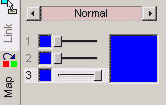
Switch to Selected and pick some color for selected:
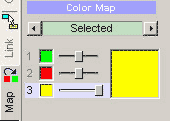
6. That's it. Setting the Normal state will make sure the text is always visible even if not selected and the selected state has a different color.
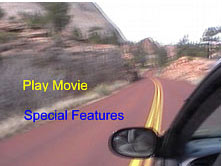
This is very simplistic Motion Menu, but it is done without much effort. You can use your knowledge from previous chapters to build an underline (which will look better in this case) or use Group Hotspot to create more complex "buttons".
![]() Complex Menu
Complex Menu
For everything else, you need either some video editor or to use the build-in Render Motion and any third party MPEG Encoder to wind up with a MPEG-2 file.
![]() Other usage
Other usage
Since you can add both video and audio you can actually use Motion Menu as a sort of movie. There are some benefits and disadvantages of this approach. For example, having a movie in a Menu enables you to link the end of it to any other Menu (in Connections or Force Action Btn on some invisible button). This may also give you an advantage of using 16:9 videos (in Movie) and 4:3 video (in Menu) on the same disc.
One limitation of this approach is that you can't use Chapter Points as a Motion Menu. However, remember this option when you need to pull out some tricks which can't be easily done with Movies.