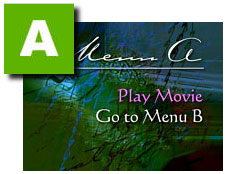
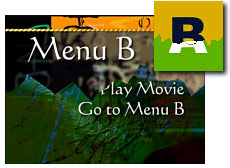
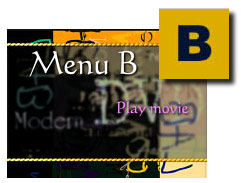
DVD-lab uniquely provides an interesting visual effect: a transition between two Menus. This is done by inserting a motion Menu in between Menu A and Menu B.
The effect is such that, when you click on a Button on Menu A which is linked to Menu B, you will see a short transition when the Menu changes, such as blending, zooming, panning, etc. Used with artistic care, this feature can enrich the visual experience of the viewer.
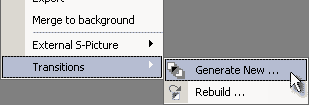
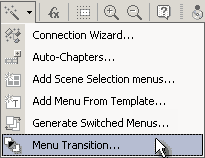
We need at least two Menus (A and B) to add a Menu Transition. It also helps if there is a link between the two Menus already established, but it is not required. Then, select either "Menu - Transitions - Generate New..." or from the Wizard button select Menu Transitions.
 |
 |
A transition dialog will then appear where you choose the direction - from what Menu (Menu A) to what other Menu (Menu B).
![]() Note: You can make a transition both ways. For example, from Menu 1 to Menu 2 and/or from Menu 2 to Menu 1. There is no limit to the number of transitions in a Project.
Note: You can make a transition both ways. For example, from Menu 1 to Menu 2 and/or from Menu 2 to Menu 1. There is no limit to the number of transitions in a Project.
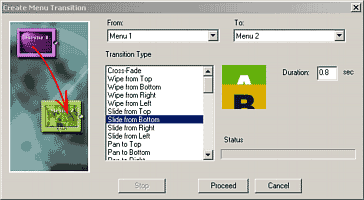
Choose the From Menu and the To Menu using the pulldown list of Menus that DVD-lab knows are in your Project. Alternatively, you can use a blank To Menu, this will have the effect of going to black (nothing) instead a real Project Menu.
Then, pick your Transition effect. There are many different transition styles to choose from. The last thing is to select the duration of the transition. It usually works best around 1 second.
 |
 |
 |
DVD-lab will then prompt for the file name of the new MPV file it is going to create for you.
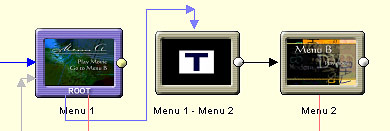
If a link from Menu A to Menu B was already created, then the new transition will insert itself in the flow:
 |
 |
|
| Menu 1 link to Menu 2 | Menu 1 link to Menu 2 through the transition (Menu 1- Menu 2) |
If you don't have a link created, then the transition will create a link to Menu B and you will need to manually choose a Button on Menu A and link it to the newly created transition.
![]() Note: The transition video will be created according to the
Project's TV standard (NTSC or PAL) and Size (D1, Half, SIF...). If you change these settings
at any time whilst working on this Project, you will need to rebuild the transitions.
Note: The transition video will be created according to the
Project's TV standard (NTSC or PAL) and Size (D1, Half, SIF...). If you change these settings
at any time whilst working on this Project, you will need to rebuild the transitions.
![]() Update or change Transition
Update or change Transition
Since a Transition is essentially a video clip, anytime you change the look of your Menus, you need to re-create the transition. This is simple to do since the transition "Menu" remembers it's settings. This way you can easily change the transition type without deleting the object and creating it again.
Transitions are rebuilt by either by opening the transition "Menu" and then using "Menu - Transitions - Rebuild..." or even better from Connections view, right-click on the transition and from the context Menu select "Rebuild Transition" as shown here.
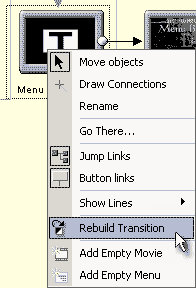
You will return to the Create Transition dialog where you can change the duration or transition type and build the transition video once again.
![]() Custom Transitions
Custom Transitions
Transitions are generally 2 kinds - the pre-defined (algorithmic) ones which are in the first half of the Transition type list (such as Pan, Move, Page Curl) and the Bitmap or Custom type. This gives you a lot of freedom to create your own transitions.
Custom Transitions are grayscale jpeg files 720x480 in the Transitions folder.
Examine the Bars.jpg
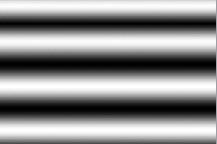
The Custom transition will simply progress from black to white during the Time duration and use the intensity to mix the A and B Menus. The pixels which are below current intensity will be Menu A and pixels above the intensity will be Menu B. As the current intensity progresses towards white, Menu B
increases in visibility whilst Menu A decreases in visibility.
It helps if the transition jpeg file is the size of the system (NTSC or PAL) but you can use any size and it will be resized to cover the whole frame.
![]() Transitions from outside DVD-lab
Transitions from outside DVD-lab
Since a Transition is really a short MPV video file, you have the option to create transitions outside DVD-lab as well. You can export Menus as a AVI file (See Menu - Export) then bring them to your video editing application and apply transitions to the AVI files. Then, export the AVI file to a MPEG-2 DVD file. Now, you can create a motion Menu with this file which is called from a Button on Menu A and a timeout to Menu B.