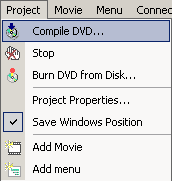
Menu: Project - Compile DVD
After you design the DVD it is time to compile it. Compiling means that DVD-lab processes all the assets and features of your Project, converting them into DVD files ready to be tested and then burned onto DVD media.

![]() Errors and Warnings
Errors and Warnings
Before you start the compile process, DVD-lab will check all data and display possible Errors and Warnings

The warnings can be ignored - these are the best suggestions or things which you may have forgotten, but they don't essentially make problems for the DVD.
The errors are serious problems which will make the DVD unplayable.
You can't continue with Compile unless you fix all errors.
![]()
![]() Compile
Compile
DVD-lab favors the two-step method of DVD creation. First, you Compile the DVD to hard disk, which enables you to test it from hard disk with a software DVD player such as PowerDVD or CinePlayer. Then, if everything is fine, you can burn it to DVD media with either the DVD-lab internal record module or any third party software you have good results with such as Nero, Gear, Easy CD/DVD, Prassi, etc...
There are few groups of parameter settings in the compile window.
![]() Output folders
Output folders

Here you set the output directory. Output Folder is the place where the final compilation files will be created. The folder you specify will be the root to the VIDEO_TS and AUDIO_TS folders. In the example above a folders G:\VIDEO_TS and G:\AUDIO_TS will be created and the DVD files will be compiled into the VIDEO_TS folder.
![]() Note: It is normal for the AUDIO_TS folder to be empty on a DVD-Video Project. Do not delete this folder as the DVD player expects to see it.
Note: It is normal for the AUDIO_TS folder to be empty on a DVD-Video Project. Do not delete this folder as the DVD player expects to see it.
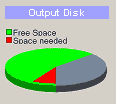
The Pie graph on the right shows the free space (green) on the drive where you specify the Output folder. The red part of the pie is the space that will be used to compile the DVD.
![]() Temporary Folder. You can speed up the process when you set a temporary folder which is on different drive than the Output folder. This temporary folder will be used during multiplexing.
Temporary Folder. You can speed up the process when you set a temporary folder which is on different drive than the Output folder. This temporary folder will be used during multiplexing.
If there is not enough free disk space required for all the files, a icon exclamation will be displayed near the troubled data.
![]()
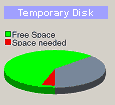
The Pie graph on the right shows the free space (green) on the selected temporary drive. The red part of the pie is the space that will be needed.
![]() Required Space
Required Space
DVD-lab will check and calculate the free disk space needed on the Output and Temporary drive

Estimated DVD Size - this is the DVD data which will be put in the Output Folder. These are the data you are going to record to DVD. It displays the data in computer format (Here 2.12 GB) and in DVD data format (here 2.44 GB). The DVD data format is a format where 1KByte has 1000 bytes as opposed to computer format where 1KByte has 1024 bytes. If you know your DVD-R has 4.7 GB then look at the second number to see if it fits to DVD or not.
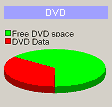
The Pie graph on the right shows how much data will be used (red) on the 4.7 GB DVD disc.
Temporary Space - the space needed on temporary disk.
Total Required Space - this is the sum of both the temporary and output folder required space. The exclamation point will be shown if there is not enough space to create the DVD on your hard drive.
![]() Pre-Compile Options
Pre-Compile Options

Rebuild All Transitions
Just before the compile starts, all transition will be re-created. This will make sure the transitions reflect the menu changes.
Create/Use Frame-Index Chapters
This feature will first perform frame-indexing on all movies if the index doesn't exist and then use the Chapter Points in a frame format instead of time-code format. You can optionally create a frame-index before compilation from menu Movie-Frame Index - Rebuild Frame-Index. See more about this in the Frame-Indexing section.
![]() Compile Options
Compile Options

Run on Background
DVD-lab allows you to run the Compile as a background process. This enables you to work on the project or any other project during Compiling. If you use this feature, a Compile window will be opened in DVD-lab where you see the Compile progress and you will get full control over the application. You can even start doing a whole new project while Compile is processing.
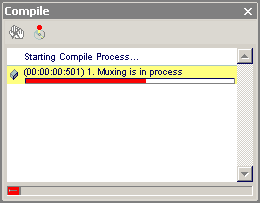
You can also exit from DVD-lab during Compiling. In this case, you will be prompted with a question whether to stop the Compile as well or leave it running and detach it from the closing application. In the second case the Compile window will be detached from DVD-lab and the application will close leaving the compile running in its own new window.
NTSC Safe Color
You should leave this set, For more info read here.
Reduce Jitter
This will reduce the Jitter on Menus by applying a special de-jitter filter to each menu.
Test Compile
Because multiplexing long movies is a most time consuming operation, you can let DVD-lab replace the movies with a dummy MPEG file as a place holder. This will make the Compilation very brisk and you will be able to quickly test the overall layout and flow of links on your menus with a software DVD Player such as PowerDVD or CinePlayer.
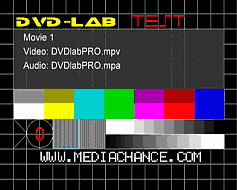
This is a very fast way how to test your DVD Project performs without a long wait for the multiplexing phase to finish.
Compile without Abstraction layer
A special option that create DVD without DVD-lab's abstraction layer. Read more in Abstraction Layer.
![]() Post-Compile Options
Post-Compile Options
![]()
Automatically Start Recording
Optionally, you can set a parameter to have DVD-lab run it's Recording module after the Compilation is finished. However, this is not recommended. It is better to first test the compilation with a software DVD Player, playing the DVD files from your hard drive and then record it. This will save a lot of wasted DVD-R media.
![]() Necessary Demultiplexing
Necessary Demultiplexing
Even if you choose Program MPG or VOB files to be imported without demultiplexing, there is still chance in special situations that the demultiplexing is actually necessary prior compile.
These situations are:
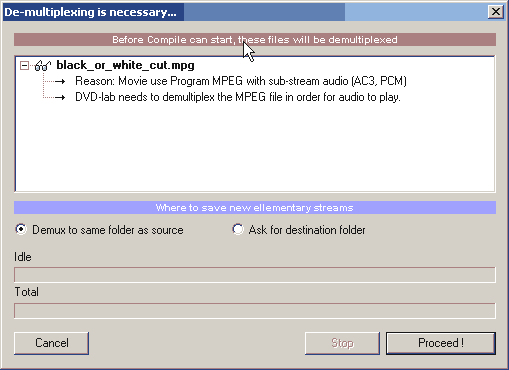
![]() Note: As mentioned above in (1), some MPG files that have AC3 streams as audio may be in fact full VOB files
but wrongly named with an MPG extension. In this case it is easier to rename the *.mpg file to *.vob, import it again and use it directly. Unless the (2) apply to the VOB, compiling vob files will be much faster.
Note: As mentioned above in (1), some MPG files that have AC3 streams as audio may be in fact full VOB files
but wrongly named with an MPG extension. In this case it is easier to rename the *.mpg file to *.vob, import it again and use it directly. Unless the (2) apply to the VOB, compiling vob files will be much faster.
![]() Testing the Compiled DVD
Testing the Compiled DVD
To test the DVD from your hard drive use any software DVD player which can run DVD's from hard drive files. For example, PowerDVD, CinePlayer, WinDVD and others can do that.
On a software player, try opening the VIDEO_TS.IFO file in the VIDEO_TS folder as a kind of header or index file to start the DVD. Some players need you to open this file from within the player.
![]() Note: The software DVD players can have their own issues. Each software has it's own little quirks and features. For example, PowerDVD doesn't correctly display a menu if a project is not Full D1. Try your project on as many software players as you can to insure consistent performance results.
Note: The software DVD players can have their own issues. Each software has it's own little quirks and features. For example, PowerDVD doesn't correctly display a menu if a project is not Full D1. Try your project on as many software players as you can to insure consistent performance results.