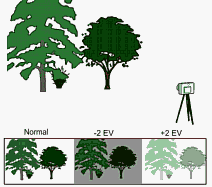
Usually the simplest and best way is to take three shots: -2EV, 0 EV and +2 EV images. This produce enough dynamic range and it is simple to work with three images.
If you want maximize the tone mapping effect for a special high-impact image, you may try to capture expanded range -3EV to +3EV. Many cameras do not allow for Exposure compensation less than -2 or more than 2 EV and unless you have reasonable manual mode where you can change independently speed and aperture you are pretty much staying within -2 to +2 EV.
You can also use -1EV to +1EV which will limit some of the details in very dark and very bright areas.
Here is a comparison of a well exposed single 0EV image and a tone-mapped HDR files that were created using different steps between exposures. In all HDR cases 3 images were taken with the median being 0EV. All four images were adjusted with gamma = 1.45.

On evenly exposed scene there wasn't much difference between +/-2EV and +/-3EV. You may see difference between +/-1EV and +/-2EV where the later has produced deeper and more detailed sky, but the +/-1EV shows more natural photographic results. It is important to mention that the scene was evenly lit without too much strong light and strong contrast, as you can see on the single 0EV image. At last we tried to combine 8 images -3,-2,-1,0,+1,+2,+3 EV but the result was no different than the 3 image setup above, except it took more time to align all 8 images. Therefore most universal method for a normal scene is to use 3 image -2EV, 0EV, +2EV.
First make sure the normal exposure works reasonably well for the scene, that is, the image in 0 EV is evenly exposed without significant parts of it being over/under-exposed. In case of landscape many automatic cameras would favor to over-expose sky, in order to bring people and landscape into correct exposure. This is of course desired for normal photography, but for our expanded dynamic range we would prefer to have the middle image exposed rather evenly. You may try to lock exposure on the sky.
A good range of exposures.
This is the garden scene that is used in this tutorial and shows a good range of exposures for our purpose. Notice that the middle exposure itself has no bright lights that are clipped (over-exposed). This is a good way to capture a HDR image. For bigger view you can look here.

Not enough exposure range.
Sometimes with bright light and automatic cameras, even the under-exposed image could still clip light and not capture any details in the highlight area. This is of course the camera metering trying to produce a viewable picture as it expect that the bright light is not the main focus on our scene.

In the image above the bright light area is over exposed on all three exposures. This will produce unusable HDR for tone mapping and it even could introduce artefact to the image on the highlights because there are simply not enough details there. In such case we have to capture at least one more image that is significantly under-exposed to get the details of the scene behind the window.
If you have Auto-Exposure Bracketing that can work with -2EV to +2EV you can use that instead of manually changing exposure. More typical AEB in range -1 to +1. Sometimes it may not be enough for scenes with high difference in contrast (looking from inside out through window for example), but you can start experimenting with that as well.
You can take more than three shots in various EV in between the -2 and +2 EV range, but in many cases, this doesn't produce significantly different result. However this could be a good way to minimize image noise, because stacking many photographs will reduce it.
Using tripod will speeds up the HDR creation process, since you will not need to align the images, or maybe just align them very minimally.
