Mediachance

Scanning Negatives with Bellows

If you want to scan negatives at home there are few options. The most common these days is to use flatbed scanner with a negative attachment (which is basically a light inside the lid and some sort of plastic negative holder). Then there are dedicated film scanners that usually produce sharper results such as Canon CanoScan FS, Nikon CoolScan, Minolta multi Pro etc.., most of them being produced 20 years ago when the thing of scanning negatives was on everybody list which brings up the pesky issue of old drivers and new operating systems into full attention.

Both of these methods have one thing in common – it takes a very long time to scan. Each frame scanning and processing would be measured in minutes. Minute by minute and it can take easily few hours per roll of film. If you have many rolls to scan you will probably gave up pretty fast after you realize that you are going to be scanning for next few months.

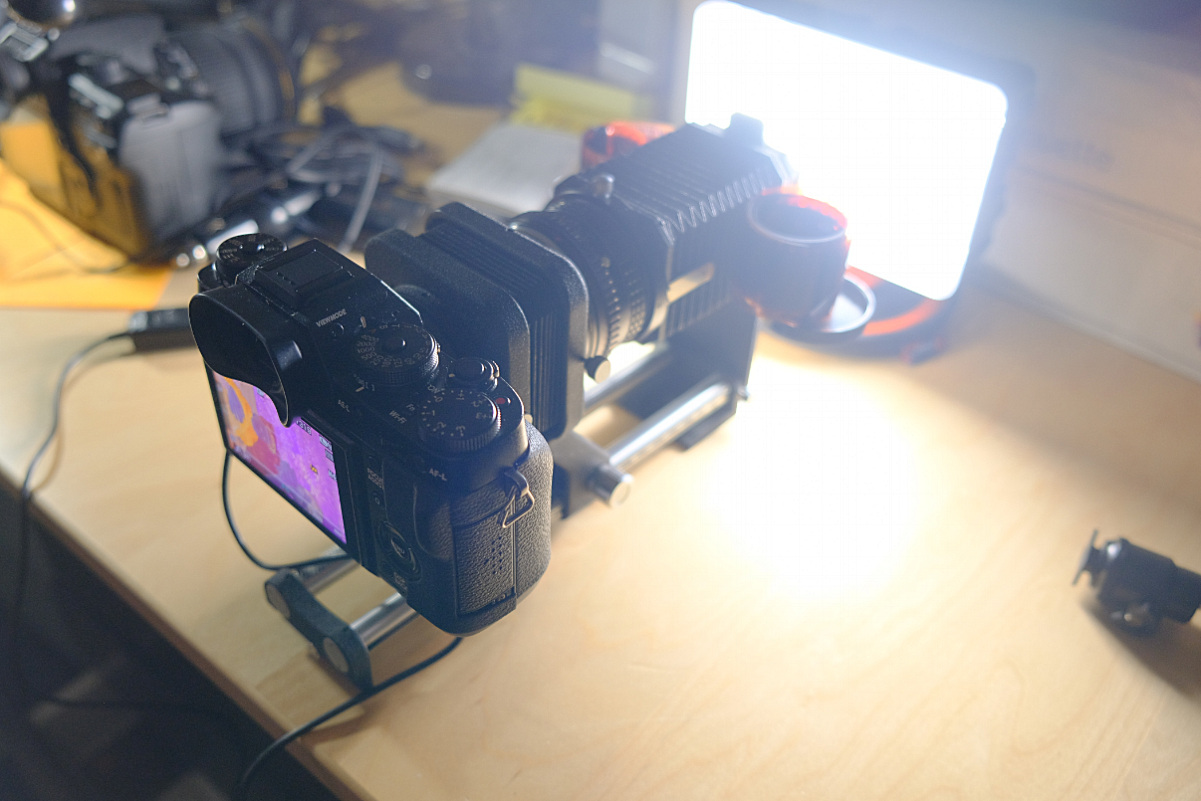
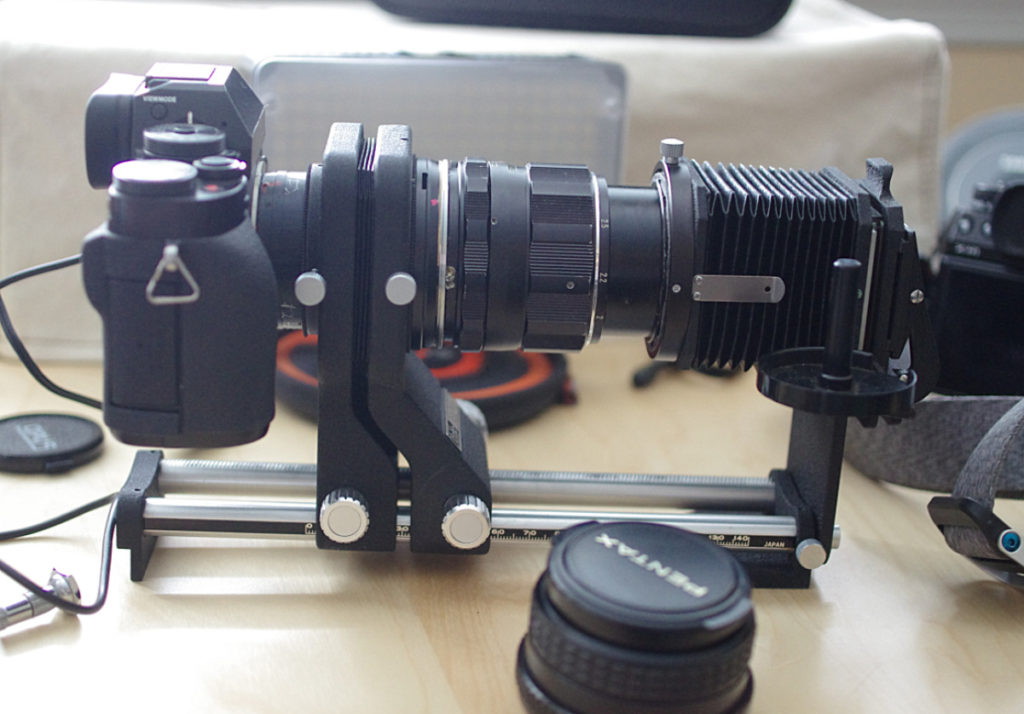
Here I am describing a method that has been largely ignored, yet it is around 100 times faster and produces sharp results and resolution comparable to film scanners. Yes you can scan whole film in less than 2 minutes.


Enter the largely forgotten world of Macro Bellows

Having all on a single rails ensures that everything is is lined up, parallel and perfectly centered.

Macro bellows were commonly produced in the past for extreme close up photography by all major companies. (We are talking about 1970’s) Most of them would also offer some sort of film attachment for duplicating slide films and negatives.

Pictured on the left is a Vivitar bellows version with the copy atachement. Bellows are something like adjustable macro rings. By adding space between the lens and the camera we are able to focus much closer to the subject.

The best part is that you can find these dirt cheap (mostly because they need to be adapted to modern cameras and lenses before they can be actually used). In case of my Vivitar Bellows (which cost me whole $12 bucks with the film copy holder) that means adapting the camera and the lens to a T2 thread. This process may be actually easier with bellows made by a single maker for their system such as Nikon which would then use Nikon mount with Nikon lenses.

Adapting camera to the bellows is easy – there are many adapter rings that allows attaching this-or-that lens mount to any modern camera system. I am using Fuji X-T1 and of course there is FX to T2 adapter available. (In my case I 3d printed the adapter while waiting for the proper metal version to be shipped to me)

A little more challenging is to adapt a lens to the bellows. This requires an adapter from “whatever lens” to “whatever mount” your bellows has. If this was a Nikon that would be easy as you would use Nikon lens and that’s it. My Vivitar bellows has T2 mount on both sides which means I need to find the correct mount from whatever-lens to T2.

As for the lenses, for 35mm frame you want to use a prime lens that is about 50mm – 60mm, best if it is macro capable. There is also a trick which can be used with most other lenses – reversing them (yes you put the filter end towards the camera). This adds a bit of complexity in the adapter department and I won’t even go there. Fortunately there is a whole market for old used manual 50mm lenses.
I opted for pentax mount. Old manual pentax lenses are plentiful, inexpensive and great quality. (I paid for the one on the left about $10 in a thrift store)

Aperture ring on the manual lens is another thing that is common with old lenses and it is necessary because otherwise you have no other way to set aperture and you don’t want to use it wide open on fast lenses.

In my case the challenge is to mount PK lens to a T2 bellows. Such adapters were produced in the past so an old camera exchange store would be the best bet. In my case I made the adapter by myself (first I 3D printed one which was reasonable, then I actually disassembled some T2/Minolta ring and combined it with a mount from old pentax camera, some precise drilling and some very tiny screws and produced a super sturdy metal version of the adapter)

In my “production” version I ended up using a little beaten up Super Macro 50mm f4 Takumar lens that I found in the local ads for peanuts. It even included M42 to PK adapter so I could just swap the pentax lenses without making new adapter ring.
The advantage of using macro lens is that you can use the lens itself to fine focus to the film plate as it offers long focusing variability. With non-macro lens you would use the bellows itself to focus since the focusing of non-macro lens would make very little difference.

The last part is a light source behind the copy atachement which shouldn’t be a problem these days with plenty of LED photo lights. In my case the F4 of the lens was a good aperture that evens out any of old film curvature. I could set ISO 200 and shoot with about 1/30 to 1/60 shutter. The focus peaking on X-T1 makes precise focus very easy.

So what is the final word? The above contraption offers an incredible speed. “Scanning” entire roll of film is under 2 minutes – just basically how long it takes to advance the frame and press shutter button. As for quality it easily beats scanning on flat bed scanner – both for resolution and the sharpness. And I say it can easily match dedicated film scanners.

In the next part we will create a process in Photo Reactor to quickly turn the negative images into properly adjusted and toned positive images.