Menu - Scene Selection Menu - Film Strip
Another type of scene selection menu is one that we call "Film-Strip". This is a more advanced and complex set of menus that are linked together to create a special motion interaction.
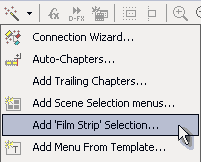
After we add chapter points to a movie we open the wizard from Menu - Scene selection menu - Film Strip or from the Wizards button just under the top menu, select "Add 'Film-Strip' Selection ...".
You will be prompted with the dialog box:
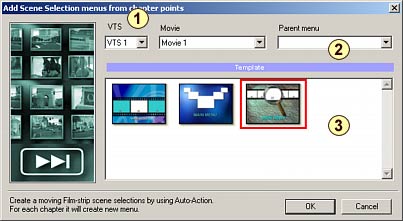
First you have to choose from which movie in what VTS you want to create scene selections (1).
Then choose which menu is the parent menu to the newly created scene selection menus (2). The "Main Menu" buttons on the new scene selection menus will be linked to this menu as successive menus are added.
Lastly, choose which template (3) you would like to be the base Menu to be populated.
When you click OK, a number of linked menus will be created
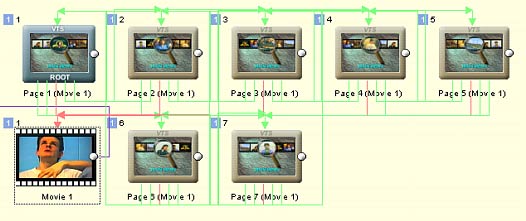
![]() Film-Strip will create each new menu for every
Chapter Point!
Film-Strip will create each new menu for every
Chapter Point!
Film-Strip uses a "switched menu" trick for the interaction. When user press left or right arrow on his remote the button will use auto action (without the need to use Enter button) to "switch" to other menu that has different thumbnail selected. The result is as if we move a film where the center is the current thumbnail.
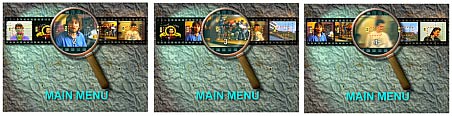
![]() Create the Film-Strip Template
Create the Film-Strip Template
Most of the actions described in Style for Scene selection apply here as well. The Template is a *.stm style file in Styles - Filmstrip folder. It may help if you load one example and move things around.
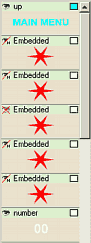
As in the Style, the places for thumbnails have a Button Label "placeholder". It can be a simple rectangle. You have to design the placeholders from left to right so the left most is bottom-most in layers. You need to use 3 or 5 placeholders. Then you need to put a frame or other object (star, circle etc.) on top of it them that will be used for highlighting. They have to be also in the order left-to-right and they need to be set Invisible Normal. The Auto Action will be set automatically so we don't have to set it. You may also place a text object called "number" on top of placeholder that will be replaced by the chapter number. The object (text for example) that links to Main menu has to have a Button Label of "up".
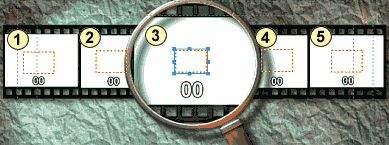
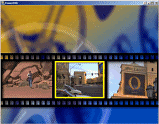
In the style above we want 4 small thumbnails and one large thumbnail in the middle. They are simple white rectangles, but they must be in the order from left to right, see the layers:
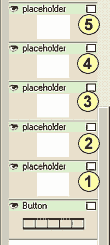
On top of them we have 5 numbers with button label "number" and then 5 Invisible objects (stars in our case) that will be used for highlighting. The middle star is set to Invisible All - we don't want to see it at all. The other 4 stars around are set to Invisible Normal - we want to see it only when highlighted.