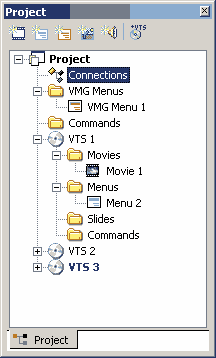
A Project window displays the items that make up your Project, in a well-organized manner. The items in a Project represent what the contents and elements are that will comprise your DVD when Compiled. They also represents a window which can be opened on the workspace. These items are Movies, Menus, Slideshows and the Connections between them. While you can add many Movies and Menus and Slideshows, there is only one Connections item for each Project.

The Project window logically group the object into separate types.
Open an Item window.
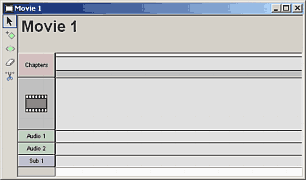
For example: To open a Movie 1 window to add Video and Audio, double-click on the Movie 1 item in the Project window. The opened Items will be also indicated on the workspace tab:
![]()
You can open or close these Items as you like. If you close a particular item, for example a Movie 1, it will still remain in the Project, though the window will be hidden

Deleting an Item
You can delete an Item from the Project by selecting it in the Project window and pressing the Delete key on the keyboard. You can also delete Movie or Menu or Slideshow items, you can't delete the Project Connections.
Adding Item
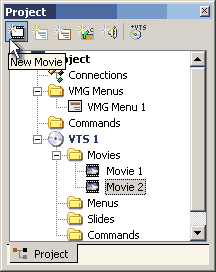
You can add another Movie or Menu item by clicking at the buttons right above the Project tree.

Every Video on the DVD needs to have its own Movie object, even a short clip. At least one Movie object with a Video clip must be present in order to compile the DVD.
A DVD doesn't need to have a Menu. It could just start playing movie as you insert the DVD into the player. See Connections.
Adding new VTS.
DVD-lab PRO is a multi-VTS authoring system. A VTS (Video Title Set) is a group of movies and menus that share similar properties. If, for example, you need to include a 16:9 movie and a 4:3 movie to your DVD project, then each of these movies must be contained within its own VTS.
To add VTS simply press Add new VTS button.

A new VTS will be created and also an empty movie object will be placed there. (Each VTS has to have at least one movie object)
To delete VTS simply select it in the Project and press Del key.
![]()
VMG and VTS Menus
In multi-VTS application there are two types of menus VMG (a kind of top level menu) and VTS menu (menu that is attached to VTS). Each has its own purpose. You may start using normal Menu if you are not sure about the technical details but once you add another VTS you will soon see the need for a top level menu (VMG). For a more detailed description and further information, please see here.
To add normal VTS menu, press the Add menu button (cyan)
To add VMG menu, press the Add VMG menu button (red)
![]() DVD Topology.
DVD Topology.

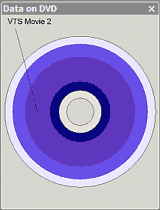
You can view a simple overview of the data as they would be physically written on the DVD.

As you select an object in Project, it will be also be highlighted in the DVD Topology window as a ring which represents the physical position of this data on the DVD disc.
![]() Note: The place near the DVD edge are the best candidates for scratches. It is then wise to add there less important data. That means, when you are adding movies start with most important ones.
Note: The place near the DVD edge are the best candidates for scratches. It is then wise to add there less important data. That means, when you are adding movies start with most important ones.
The physical view will also help you determine how far the DVD laser needs to jump if you connect two movies together.