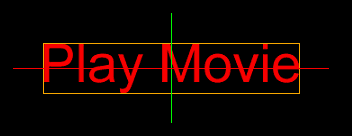
There are two types of transformation:
| • | 3D rotation |
| • | Perspective transformation |
3D Rotate
This will rotate the object around the 3 axis.

Select object, then click on 3D Rotate button.

Click on the object and move the mouse while holding down the mouse button.

Options
Holding ALT, SHIFT or CONTROL will rotate only around one axis
ALT |
CONTROL |
SHIFT |
|
|
|
Rotate object around Z axis. This can be used as a simple 2D rotation around center |
Rotate object around X axis. |
Rotate object around Y axis. This can be also used to flip the object left-right. |
Perspective Transformation
Another Transformation effect is the Perspective Transformation of objects.

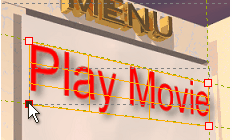
In some cases a 3D rotation is not enough to simulate the desired effect. Look at the image below:

In the case above the "Play Movie" doesn't look like it belongs to the image, because it doesn't fit to the perspective. For such cases we can use Perspective Transformation.
With Perspective transformation we can "fit" the object to the perspective of background.

Click on the Perspective Transformation Tool, then adjust the four corners of the Perspective box until the perspective of the object correspond to the perspective of the background.
Perspective Transformation allows us to create many interesting menus:

Original box
When you are editing Perspective Transformation, there is a dashed rectangle displayed over the object. This is the Original Box, showing the original size of the object. When a quality of the image is important you should move the four handles within inside of the box (1). When you resize the object outside the Original box (2) some edges may be more blurred.

Note 1: The 3D rotation and Perspective Transformation use the same data properties. You can apply Perspective Transformation after 3D rotation, however if you then use 3D rotation after Perspective Transformation, the transformation will be first reset to its original size.
Note 2: When you use rotated or transformed objects as buttons, you have to remember that the active part of the button is the largest bounding rectangle around the object. For example you can't place for two text objects rotated 45 degrees (1) too close because they will overlap (2). Overlapped buttons will show strange highlighting effects (3). If you want rotated text, it is always best to use bullets as highlighting (4).

Note 3: You can move the transformation handles to such position in which they no longer define a rectangular surface. In such case you may see effect as shown on the second image:

Reset Transformation
Right click on the object, from the menu select Reset Transformation.

This will reset both rotation and perspective transformation.


