|
Bump/Normal Map editing |
  
|
|
Bump/Normal Map editing |
|
The Transparency palette can be also used for adjusting Bump and Normal maps. Instead of changing transparency of the object we can adjust the height of the Bump Map by clicking on the Bump Map Offset checkbox. First you need to select an object, then use either of the Transparency Mask. If you want to just change height of the object in bump map, move the transparency slider while it is on Flat mask.
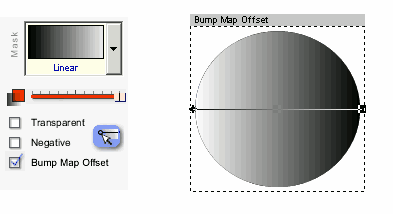
To get back to the Bump Map editing mode at any time, click on the blue button with arrow on the Transparency palette.
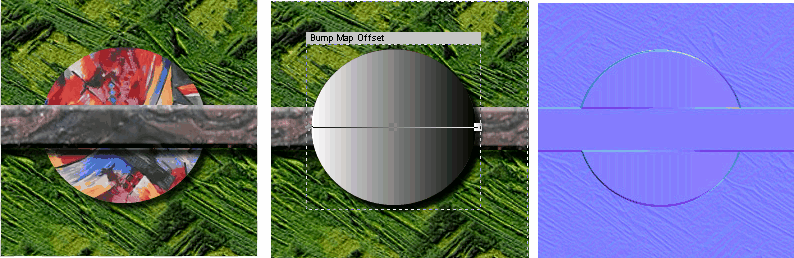
When we go to the Bitmap Export and select Bump the Bump map offset will be applied where the darker areas will be pushed backwards.
To get back to the Bump Map editing mode at any time, click on the blue
Flat Offset
Each object is normally automatically put on higher Z level in Normal and Bump maps.
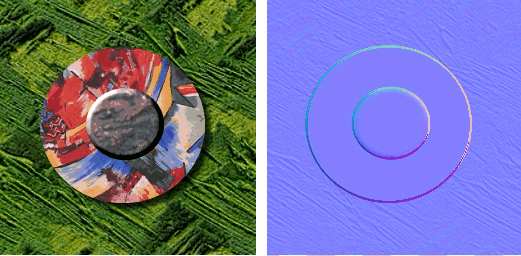
To adjust this we can use the Bump map Offset with Flat Mask.
Move the slider on Transparency Palette to right so the Bump Map offset become available. Click the Bump Map Offset.
Moving the Slider will change the Bump Map color to darker which means the object will be "pushed" down. This will be visible only on the Bump or Normal map as nothing else will change on the texture image.

Adjusting Bump map is especially important for creating interlocking patterns with Push-Back tool.