Two Point Auto-Mask |
  
|
Two Point Auto-Mask |
|

This is advanced mask for more complex yet well defined objects. Unlike the Quick Auto-Mask that is constrained by its rectangle - Two Point Auto-Mask takes the whole image into consideration.
This is good mask for vistas, skylines or more complicated flowers and objects.
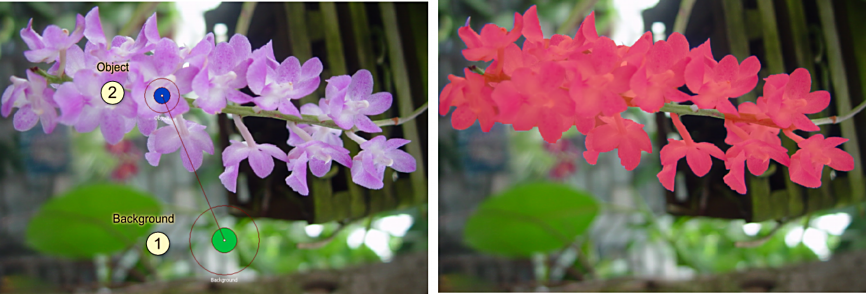
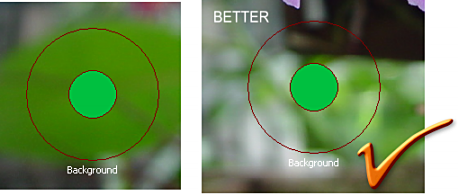
It is two point step: first we need to pin a background with a large circle (green pin) then pin the "object" or foreground with the smaller blue pin. In both cases the outer circle of pins (thin red outline) has to be all within the designated area (background or object) not cross over.
Flowers Example
For Skyline:
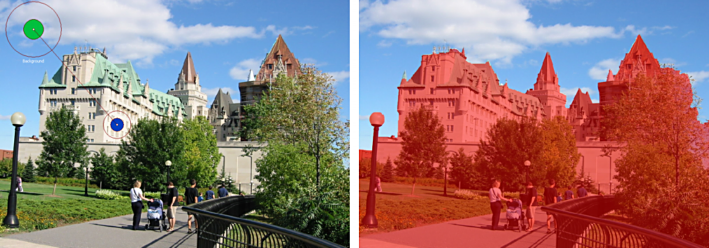
The Two-Point Auto-Mask is much more liberal in deciding what belongs to the object.. It is designed to mask object only if its borders are well defined (like the flower sample) otherwise it will take much larger area. For example on the second above we would have very hard time to isolate only the buildings from sky and trees with this tool.
Tip:
The best way to place the background/object pin is over an area that has bigger variety of the different background /object colors, like we did in the first flowers example. This assures better separation of the object from background.
Here is a simple example how the pin position makes the difference in the final mask, the second time we placed the Object pin covering more of the different object colors, including the shirt and it works much better.
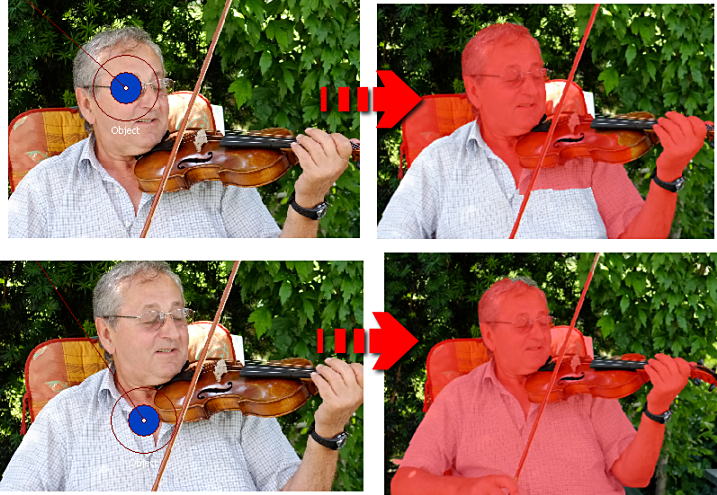
Same as with the Quick Auto-Mask, the Two Point Auto-Mask is cumulative. So in the image above we didn't have to start over, we could just add the shirt by repeating the Two point masking.