Interactive Auto-Mask |
  
|
Interactive Auto-Mask |
|
![]()
Interactive Auto-Mask is the most advanced Auto-Masking feature allowing you to exactly mark what is the object and what is the background without actually doing any hard work like with manual masking. You will probably find this is one of the most powerful tool in the whole toolbox and it clearly sets Photo Blend apart from any other editors.
It is done so by using simple painted guides. Unlike other options the mask is not updated to the project until the Apply button is used.
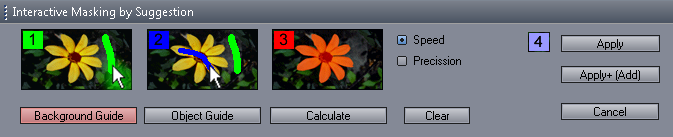
The brush size is controlled by the familiar dials on the right side of the screen (same as with Paint Mask). Pressing Background Guide button will paint a green - background guide, pressing Object Guide button will paint the blue - object guide.
Lets just start with a pretty complicated image that would fail in all other Auto-Masking tools or in fact any of the Magic wands (explained in later chapters).
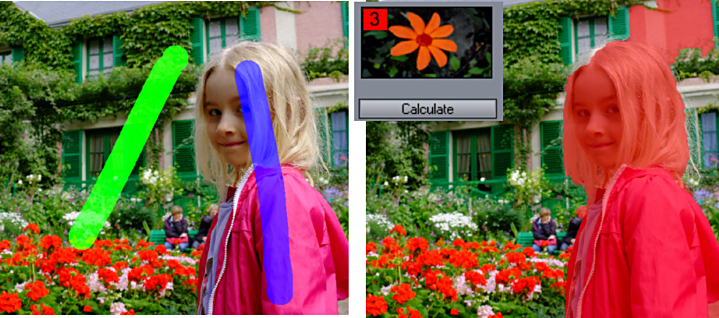
So here are just two guide lines painted on the image, green is what I want as a background and blue guide is what I am telling to Photo Blend should be my object. Then after I press the Calculate button the mask "preview" appears.
It is fairly OK for most parts, but as I expected there are some problems.Fear not, this Interactive auto-mask allows me to go back and forth between the painted guides and mask so I can fine tune it.
Just press any of the Background or Object guide buttons and you can continue painting the guides.
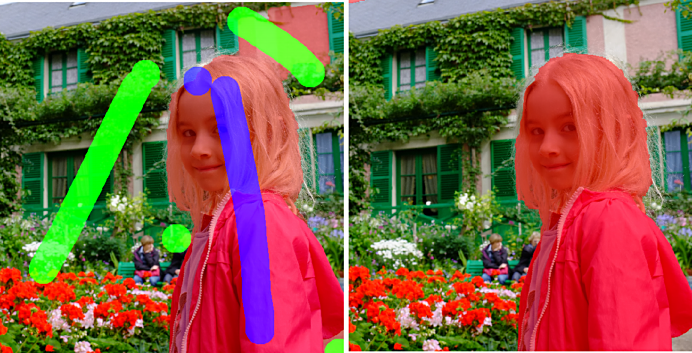
The mask is much more what I wanted. There are some small things here and there but instead of trying to do perfect job with guides, it is far easier to simply manually paint/fix the missing pieces.
Now I need to press Apply button which will apply the mask to the image and I can continue with the regular tools. Apply+ (Add) will add this mask to the masks that was previously created on the source - the Apply will replace any previous mask.
Tips:
To erase painted green or blue guide use the right mouse button.
Normally the Speed settings works best for all images and it is also much faster than the Precision settings. The much slower Precision setting may sometimes give more accurate but in most cases there is no difference.
It is counterproductive to go into too much details with the guides. It is much easier to fix any small details later manually.
To return back to the horse project, the Auto-Mask for the horse may look like this:
