Web/Multimedia Button
Overview
![]()
The Web/Multimedia Button (previously called Multimedia Extension) is a means for creating multi-faced buttons for web pages, multimedia authoring programs, or other purposes.
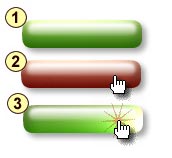
 By multi-faced buttons, we mean a button that has two or three states:
Normal ![]() , Over
, Over ![]() and Down
and Down![]()
These buttons are positioned one on top of another.
A. The Web pages typically use the Normal and Over Frame as Roll-Over element. Real-Draw allows you not only design these elements but also export as fully functional web page.
B. Multimedia authoring tools, such as Multimedia Builder, use all these images to show interactivity on the multimedia presentation.
In this chapter we will explore the possibilities to create Web Page with roll-over buttons. Next chapter will be more about Multimedia applications.
Real-DRAW can not only create the web graphics and elements but it allows you to export the projects as a whole functional web page using HTML Slicer and roll-overs.
Basics
Working with WEB/Multimedia Button is very easy. Basically you just tell Real-DRAW which object you would like to have as buttons and Real-DRAW will add Over and/or Down Frame to them, which will be initially copy of the object. Now you can switch between these frames and edit the object for particular frame.
Enable Buttons
To work with the WEB/Multimedia Button you have to open its window first. Menu: View-Multimedia Extension or the button ![]()
Each object on the canvas can have the extensions enabled, and if you click on any object, you will see that it only has the Normal state selected.
|
To enable the WEB/Multimedia Button for a selected object you have to select one of the following options: The Over Frame or the Down frame check-box. For WEB pages the Over frame is enough for creating roll-over. For Multimedia in most cases you would like to select both - creating a 3-state button. The selected item tells you in which state you are currently editing. Looking at the image on the left you can see that we are editing with the Over Frame selected. |
How to change state for editing
To change which state (frame) you are editing just click on the particular item.
Frame Positions
The frames can have different positions - you may want to move the pushed frame of the button a few pixels down and to the left to simulate the pushing action. However normally if you move the object in any Frame all frames are moved together. If you want to offset the Over or Down Frame from the other frames move it with holding CTRL key.*
* This is a change from 2.x version
How to Keep two and more Objects Together in one Button?
Many times you need more than one object to create each button on your design. Imagine, that just a simple Square with text already has 2 objects.
How do you tell Real-Draw that these objects belong to one button?
This is actually very easy - using Packages
Because Packages behave virtually the same way as single objects, you can also create a Over and Down frame for them.
Each frame will also have its own independent set of data!
How to Switch All Objects
These are helper buttons and switch all multi-frame objects to the appropriate state.

Simply click on appropriate eye button to switch all objects in document to this state.
In the next Chapter we will design a web page in Real-DRAW