Attack of the Clones |
  
|
Attack of the Clones |
|
Cloning was popular topic couple of years ago, the economic crisis brought us other monsters to worry about and while I have my doubts about the real cloning, it can be very useful in a graphics software.
A clone is just like its original, the same thing but it can be positioned separately, resized and have its own properties. What it shares with the original is its mask. You can't edit clone mask - double-clicking on the clone will always send you to edit the mask of Clone Source. Another benefit of clone is that it takes far less memory than normal source, it just points to the Clone Source for the image and mask.
What a surprise, from the single object on my scene I selected the horse to clone.
I am selecting the horse and pressing the Clone button. Few Seconds and done!
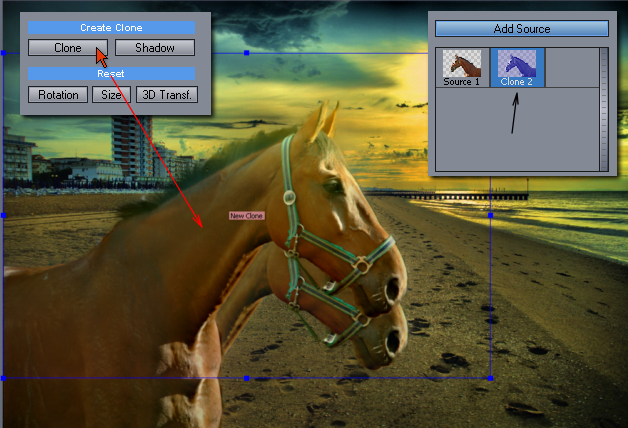
And I have two of "them" horses. Here is what happened: A new object with blue handles was created on top of my first one and also new thumbnail was added that is bluish as well. The blue is the Clone color at least in Photo Blend. Now I can position the new object, resize it and do anything else to it. However if I want to edit it in the Source mode and double clicking on it, it will open the mask but a small message will tell me that it is the Clone Source I am editing, the original horse not the Clone.
Another interesting thing is that if I delete the original, all of the clones will be gone as well. (But I can delete the clone alone)
For the sake of exercise, let's say I want the new clone to be smaller and behind the first horse (sure I can do it the other way around, but it is time to show you the Arrange tools)