Liquify |
  
|
Liquify |
|

If I feel little overworked, just like right now or yesterday or the whole month before, Liquify may be the exact tool to cheer me up. It does make my daughter laugh uncontrollably, and she is seven. She knows what is funny.
Let's roll into Source Mode again.
Liquify works on the Source Image itself (not on its Mask) and it will let me to move pixels around as if it is a liquid. I can just try to change a facial expression of the horse or probably just create a caricature by overusing the tools.
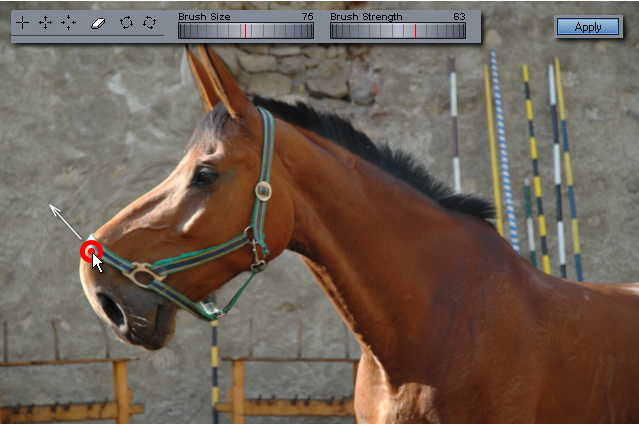
A whole new palette of tools will open on the top of the screen together with two dials and buttons to Apply Remove or Cancel. The first tool is for pushing pixels, then there is tool for magnifying pixels and minifying. Then there is an Eraser Tool (also can be invoked by Right Click) and finally rotate tools. The best is to simply try them out, you don't need examples here.
To Get a stronger effect move the dial Brush Strength all the way to right.
There are also Add/Erase Freeze Mask. A freeze mask is an helper in Liquify, not a real mask. The Liquify tool will not apply where the freeze mask is drawn (the pixel under mask are "frozen") and that allows for some additional effects. The freeze mask gets erased when you close liquify so it is only a momentary tool.
To apply this work of art there is an Apply button, but selecting any other tool will do the same as well as pressing Enter.
Esc, Cancel or pressing the Liquify button will cancel the changes.
The mask is not changed by the Liquify, so after applying the Liquify, the mask has to be fixed to reflect the new bold shape.
It is fun for few minutes, but enough is enough; to Remove Liquify, there is a Remove Button on the right of Liquify window or from the menu Source - Remove Liquify.
Tips:
•Liquify can be selected only in the Source Mode.
•It is best to use Liquify only on the images where you really want it, because it takes space in memory and then during final render this has to be all recreated on the full size source which takes more time. So pushing one single pixel around and then leaving it like that is a bad idea, either do something worthwhile with it or just remove the whole thing.
•The Draft preview after particularly heavy liquify session may look blurred but this will look much sharper on the fully rendered image where the original size will be used.
•Holding Right click will invoke the Eraser tool and you can return the areas under cursor to its normal shape
•Don't over use it, it is a bit of 1990's effect. But yes, you can use it to enlarge those eyes on a photo of your pet. Puppy with big googly eyes definitely works for children and older folks even after all those years of overusing it.