Curve Tool |
  
|
Curve Tool |
|

Keyboard Shortcut: C
The Curve tool is a rich tool because it can be used for adding or erasing Live Mask and it has also Live Curvature. This curvature option allows me to change the curve shape from a polygon with sharp edges to a smooth curve.
The "live" in the name suggest that I can change all this freely after the curve has been created, including the curve shape. The Curve stays live until I finally apply the mask (Enter, right click or start drawing another curve). The Curve tool can add mask or remove it (subtract) from the current mask. It can do it inside the enclosed curve or even outside of it.
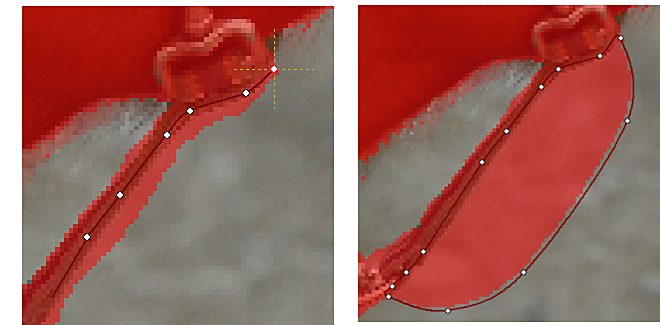
So I will use it to remove the excess mask in my harness (well the horse harness, mine is fine). I am going to zoom in and then click the curve around the edge. Just click first point then click second... Because we are in big zoom the points may jump a little in or out but part of the live curve is that I can move the points to the correct position later when I also see the mask (or lack of it in Subtract mode).
Close the Curve
To finish (close) the curve I have to click on the first "red" point which is also marked by a large orange cross.
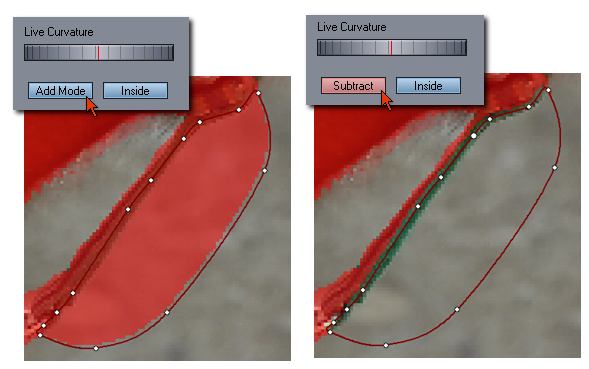
When the curve is closed, it will paint a live mask over the area. As mentioned before, the live mask is sort of temporary on a separate layer and so it can be changed without affecting the masks I had done before until I apply it.
I want to actually erase the mask, not add it.
In this case, I will press the Add Mode button on the right pane which will turn into red Subtract button and the area within the curve is erased.
As I see the curve had a little bigger bite into the harness than I wanted, but again this is a Live Curve so I can simply reposition the points and it gets updated.
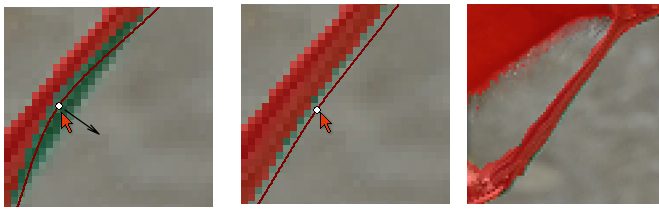
When all is said and done and my eyes hurt from all the red I can just click Enter or right click to apply the mask.
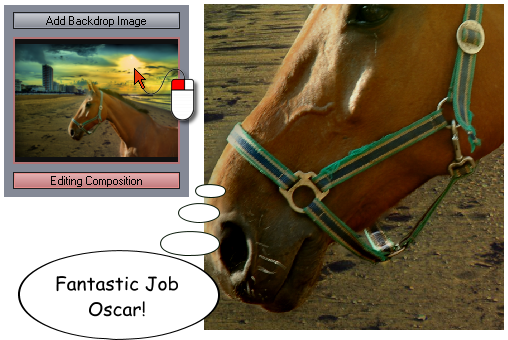
Then hurry up to the composition by clicking on the composition preview.
This part was all about introducing the Curve tool. There is a Poly tool, which is just like a curve but it simply starts with a sharp curvature so you are drawing a straight lines between points. The Free hand Curve tool is a bit different. It starts already closed and you simply click, hold the mouse and draw shape around the object, then release mouse. The rest is just like the Curve Tool.
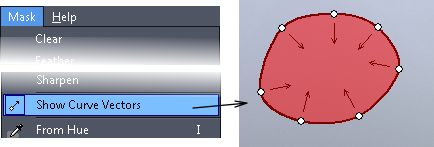
Menu Mask: Show Curve Vectors (global switch)
This helper will show little arrows pointing where the curve has its active surface. This is great for combination of Subtract and Inside-Outside options so we can see where the curve actually is applied. To avoid chaos, the arrows are not drawn for very small Inside curves.
Another usage of Curve is to create selection.
The Free Hand curve was added mostly as a quick "lasso" selection so I can erase things outside it.
And I am going to show you just that.