Fuzzy Shrink |
  
|
Fuzzy Shrink |
|
Fuzzy Shrink (Fuzzy.S)
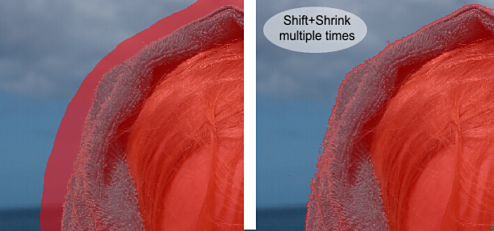
Shift + Shrink
![]()
Fuzzy Shrink is a reverse of Fuzzy Expand and not necessary a reference to "mental health professional with big hair" which was probably your first guess. (I don't blame you since you got this far reading my guide)
Where Fuzzy.E will expand area that has similar color, Fuzzy.S will shrink the area that has similar color.
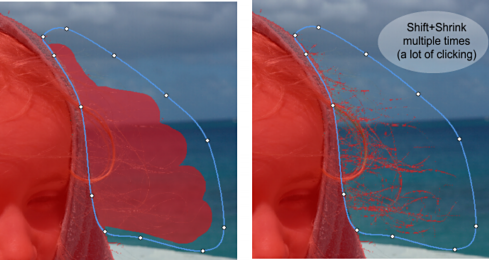
A good usage is an object on relatively solid background where I painted mask that overshoots the object. Pressing Shift+Shrink multiple times will shrink the area of the solid background up to the area that is my object.
Similarly if a hair is on a relatively solid background we can use Shift+Shrink to wrap it around the hair. (For other way to mask hair see the Auto Hair/Edges tool.
The result when viewed in Full Resolution on different backdrop is probably the best looking (and also the easiest) hair mask job I've had done with this image so far.
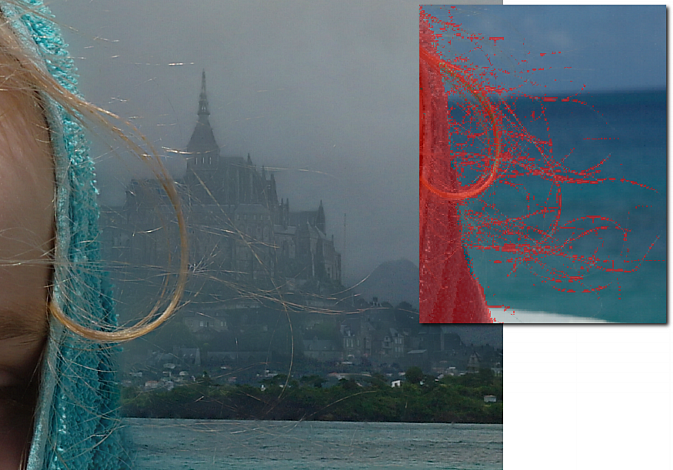
This sort of scattered and pixelated hard mask (see the smaller image with the close up of the mask) seems to work very well in Photo Blend.
While this example produces the best looking image in Photo Blend, in any other editor such mask would probably produce the worst one from all the examples that I've done so far with this image.
So it is safe to say that Photo Blend really works in opposite direction from a normal editor (that needs a bit of mental adjustment)
The reason why I show you many ways of doing the same thing is that with different images not all works equally good.
Again, as for any hair masking, this works if the object is photographed on a relatively solid and featureless background, otherwise the tool will be not able to distinguish the hair from the background. In fact most of the time neither we could.