Magic Wand |
  
|
Magic Wand |
|

Keyboard Shortcut: W
Magic Wand also selects similar colors but unlike the Hue pick which picks all similar colors from the entire image, Magic Wand picks similar colors only from the continuous area around the point where I click. It is often superior tool to the Hue mask as it is more localized to the desired area.
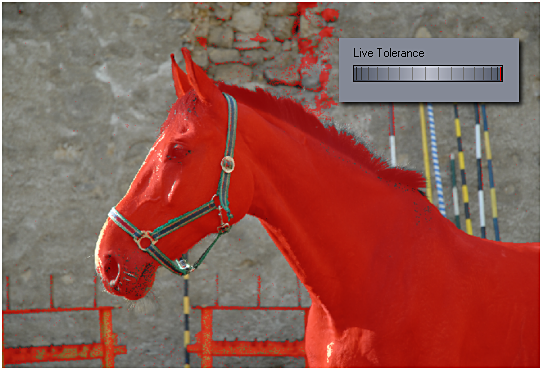
So I click on the black horse hair. Again, I have my friend Live Tolerance to dial how far the wand fills continuous areas and in this case I dial it all the way up.
Then I click on eye and nostrils and few other isolated places. Anytime if I made a mistake I can press ESC and the last Magic Wand selection will be canceled.
Tip: On many images it is easier to do a negative selection (for example a person against a sky, where we would select the sky) and then use Invert button just above the Brush Dials.
Live Mask
I will mention this from time to time, but a Live Mask is a mask created by Live tools - and those are the tools I can adjust after I use them. The Magic Wand and the Mask from Hue are such tools. (so are the Curve options we will use later).
By Live I mean that the mask created by those tools is for a brief time independent from all the masks I've painted before. That allows me to change it (like the tolerance), remove it (Esc) or even apply some effects to it (we will get to it later) while everything else stays untouched. The Live mask stays live until I do one of these:
•press Enter on keyboard
•use the tool again
•or switch to other tool
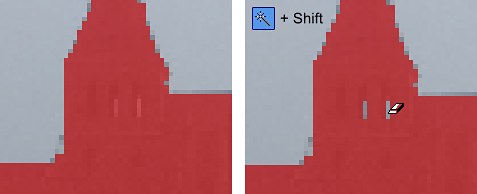
Magic Wand + Shift
Magic Wand can also remove colors. While it is not needed in the horse example, I can find another example of this building where I want to erase the windows using Shift+Magic Wand
Back to the horse. There are couple of places left without mask on the horse, but those are hard to pick with either Magic Wand or Mask From Hue, but in Photo Blend we don't really need pixel precise masks, right?
This is where my favorite tool comes to play (and this was the very first tool added in Photo Blend during development) - The Paint Mask Brush.