Selection Example |
  
|
Selection Example |
|
One good example would be using Magic Wand with Selection to preserve already painted mask.
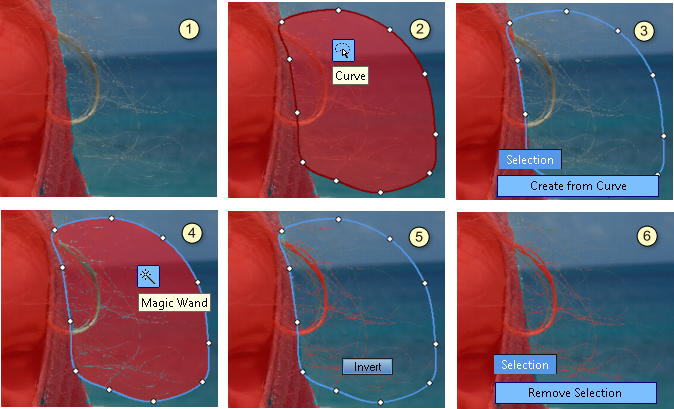
(1) Here I have already masked image where I want to mask few hair strands now. It would be difficult to pick the hairs with Magic Wand, but I can do the old Inverse trick, I will pick the blue color from around the hair. But to not disturb my already painted mask, I will use Selection
(2) I will simply draw a curve around the hair area.
(3) In menu Selection I will use Create from Curve, which will create a selection (it is blue now)
(4) With the Magic Wand and fairly low tolerance I will pick the color surrounding the hair clicking few times around various pockets of blue.
(5) Now I will press the Invert button (NOT Invert Selection). This is the button just above the Live Tolerance dial.
(6) Last thing is to Remove the Selection (Ctrl+D)
Sure you want to see how it looks like on a different background when rendered in Full Resolution and Zoomed in!
Despite the fact that my mask is a hard mask done with Magic Wand and in many places it only suggest of the hair existence, on the final image rendered in Photo Blend I can see individual hairs very clearly.
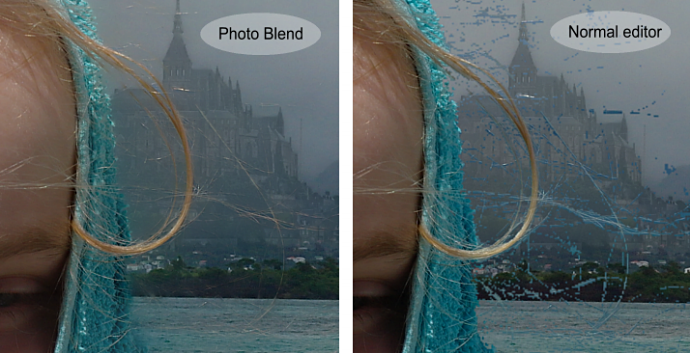
In comparison that would not be so pretty in any other editor, here the Magic Wand mask would be too rough, bringing much of the old background with it.
Remarkably, while keeping the hair at its sharpest, Photo Blend did tone down the edge of the towel as not to look like scissor cut but rather as a part of the scene.
In the next section I will explain how this business with hair can be done even better!