Compact Packages
Menu Object - Package - Compact package
This command was added for easier Internet distribution. It basically removes any pre-build Package data and sets a Package or Clone to a preview mode showing a light transparent cyan image. Then you can save the file. Compacting packages may reduce the size of the saved *.rdw file by more than a 50% per package.
The next time the compacted file is loaded, Real-DRAW will automatically rebuild the missing packages from the data and also any of the missing Clones from Packages.
It reduces the file size, but the drawback is that it takes longer during loading, due to the rebuilding time.
This is however only a one time process for any end user because once the file has done its rebuilding, it will be automatically updated.
Other things to know
There are few tips and rules for packages
| • | Packages are great if you use Multimedia Extension and then you can design a complex button, package it, and then add a Highlighted and Pushed frame. In each frame you can change the data inside the Package and the whole package will be exported as one button. |
| • | You can have as many nested Packages as you want and can for example, select 2 Packages and create a new package from them. It will have the same logic - if you edit the master package, it will open a Package Window with your 2 nested packages, and double clicking on each will open another Package Window etc. You are not limited to how deep the recursion can be, and you can have packages inside packages inside packages. |
| • | You can pack just a single object. For example you can apply one effect on the object, Package it and then apply another effect. |

Above, we created simple text with a bevel and applied a Bevel feature Halo to it. Then we Packaged it and applied a 3D Extrude and a Drop Shadow to the Package.
| • | You can't Package a single Package. |
| • | You can't use the Lens effect across documents. That means, it is fine if the Lens effect works inside a package, but you won't get the Lens effect from an Object inside a package, on objects which are outside the package. Of course, you can apply a lens effect to the whole package and that's fine. |
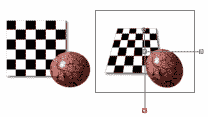
| • | You can use the Texture Size and Rotation tool on the Package and the clones as well. While the best way to rotate a Package is to use the normal Rotation tool, and to resize the Package to a normal object by, resizing, you can also use the Texture Size and Rotation tool to adjust the Package appearance in more advanced way. You can change the perspective for example, perform a crop, or stretch it in various directions. And as with other effects, Clones can each have different Texture Size & Rotation settings. |
| • | To reset the rotation settings use either Reload Package or Texture Size & Rotation - Reset. |

When resizing a package, remember that to obtain the best quality you need to resize down, and not up from the original package size. The same goes if you change perspective.