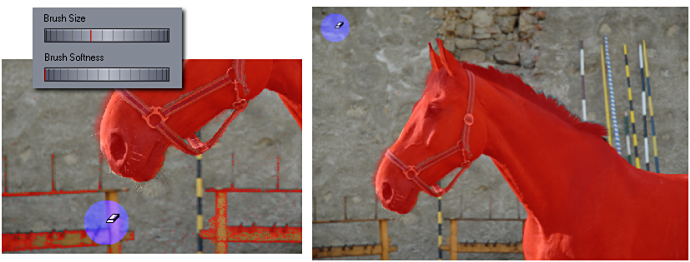
Erase Mask Brush |
  
|
Erase Mask Brush |
|

Keyboard Shortcut: E
The Erase brush works the same way as a Paint Mask brush, it just erases instead of draw mask. It is indeed the same way as using Paint Mask brush while holding Shift but at least with Erase brush I don't need to hold shift.
Here I select sharp brush (zero softness) and fairly large brush and simply erase all those little droppings around the horse (no pun intended, real horse have BIG droppings).
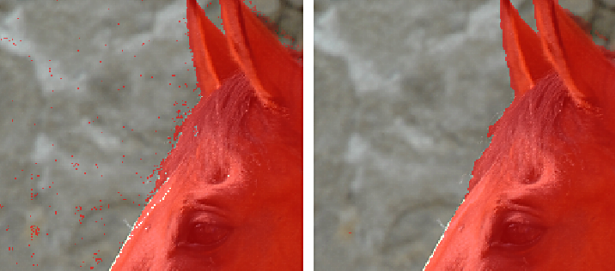
Remove Specks (menu: Mask)
If there are some small pixel size specks over the image mask from the previous masking operations they can be removed with Remove Specs effect automatically. It could be used repeatedly, but the best is to use selection to protect any sensitive areas that we don't want to be affected.
Enough with the masking
If this was in a big professional photo editor and not in Photo Blend, this would be hardly satisfactory mask, the mask leaks all over the object on many places and the horse hair masking is still very crude..
Now I click on the Edit Composition button, or click the composition preview above that button which does the same thing - switch to Composition mode.
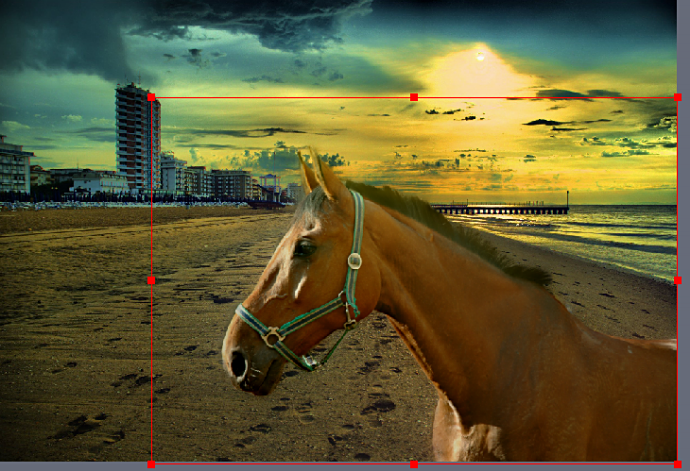
Move the horse to the side and look at it. Most of the worries about bad masks were unfounded. There could be places here and there that may require touch up depending how good we want the final image and I will show you how to fix those things. But now let's Render Full Resolution (as in previous chapter) and zoom into the image to see more details.