Tools and more tools... |
  
|
Tools and more tools... |
|
If you follow my little example of the horse on the beach then at this point the masking part is over.
And if you care about horses and beaches I would suggest you to go over to the Composition section of this guide where the great adventure continues. Then if you want to learn more about masking you can return here.
What follows in this and next few chapters are more intermediate tools and some nifty tricks to make the job of masking more enjoyable (or confusing, take your pick).
I will talk about mask effects, selections, masking color adjustment and shrinks, none of which is too necessary for first steps with the software.
Masking Effects
Just above the brush dials there are few buttons that have various functions.
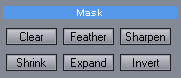
To give them very specific name, I will call them mask effect tools.
Look for more tools in the menu Mask, not all have buttons on UI.
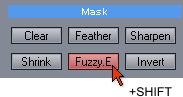
There is also a Blur, Fuzzy Expand and Fuzzy Shrink in the Mask menu which while have no buttons they can be invoked by holding Shift and clicking on Feather, Expand or Shrink button respectively.
Those tools all apply the effect on a mask.
In their most simple mode they will do it on the whole mask.
Whole Mask mode in Paint Mask / Erase Mask
In those tools the mask effects will apply to the whole mask.
Clear will clear the whole Mask and you can start from scratch.
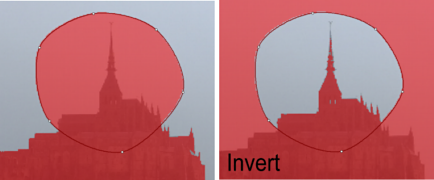
Invert will invert the whole Mask
... and all the others effect buttons will apply the effect to whole mask, the Feather will slightly blur edges of the mask, Sharpen will "un-blur it", Shrink will shrink the mask inwards one pixel and Expand will enlarge the mask area.
You can push the buttons few times to make the effect repeat.
Live Mask: Curve Mode
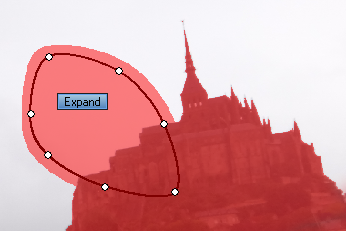
In the Curve, Poly and Free Curve those tools will have localized effect that apply within the curve.
The effect will reset every time you change the Live Curvature or move the curve point, this is done on purpose and you will see briefly a text "Effect Reset" to remind you of that.
Clear - removes the curve - same as ESC, second press removes the whole mask.
Invert - Inverts the whole mask including the current curve.
All other tools will apply the effect only within the Live Curve, for example pressing Expand couple of times will enlarge only the mask that is created by the curve, everything else will stay as it was.
The tools work accordingly if you change Add/Subtract or Inside/Outside modes.
Tip: Moving point or changing Live Curvature will reset any changes you made with the mask effect buttons.
Live Mask: Magic Wand and Mask From Hue
The effects are localized to the live mask as with the curve..
Clear - First time click, removes the current live mask - same as Esc, second click then removes everything else
Invert - Invert the whole mask with the current live mask
All other tools will apply the effect to the current live mask only. The mask that was done before using the Magic Wand/Mask From Hue stays without change.
An Example:
I did use Magic Wand, but even with high tolerance a corner or part may not be covered. (1)

So I click with Magic Wand again (2) but because Magic Wand is also mask aware it may create some pixels in between that are not masked correctly (they may be isolated pockets from the first magic wand noisy edge)
Now I press Expand button (3) and the second Magic Wand will expand and mask the pixels in between.
See also similar usage with Fuzzy Expand (Shift+Expand) in the few chapters where the expand would be also content aware.
Selections and effect buttons
Selection is a special area that doesn't paint or remove any mask and the mask effect buttons will apply only to the existing mask under the selection.
Here is an usage example:
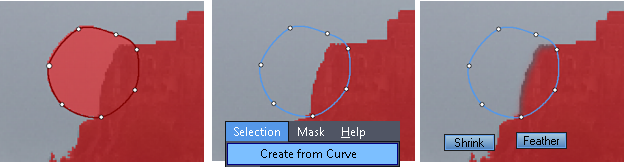
I need to soften a particular area of the edge, so I will create a Curve around the area. Then menu Selection - Create from Curve and I have a selection, the curve fill is gone and the outline is blue..
Now I can press Shrink and Feather buttons to shrink the mask under selection inward and make it softer.
Tip: Unlike the Live Curve, moving points of selection will not reset the mask effects. By Moving the points we can then apply another effects to the new selected area.