|
BlackFrame NR
 This is another ultimate Hot Pixels removal. For information about HotPixels please read the HotPixels pages first. This is another ultimate Hot Pixels removal. For information about HotPixels please read the HotPixels pages first.
So what is the difference between the HotPixels applet and BlackFrame?
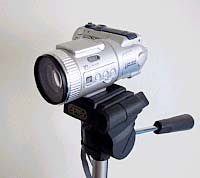
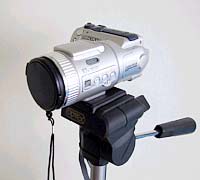
BlackFrame use surprisingly a "Black Frame" method. You take your long exposition night picture and then put a lens cap on the lens a take another picture with the same exposure time.
 |
1. Take a long exposure night shot (more than 2 sec)
|
 |
2. Put a lens cap on the lens and take "Black Frame" shot with the same exposure time.
|
What is the idea.
During short period and the same temperature the HotPixels will more likely be on the very same place on all pictures.
Now because we have the Black Frame with HotPixels, we need to subtract this from the original image.
That's the theory. This works fine if the HotPixels are in the dark places on image. But if the HP is on the lighter background the subtraction will produce a black spot. Sure it is not as disturbing as the white HP - we are talking about night shots anyway, but BlackFrame NR goes beyond that.
BlackFrame NR add 3 other methods beside the simple subtraction.
BlackFrame NR was proven to be one of the best HotPixels removal ever written.
Download:
You have two choices:
-a Stand-Alone (EXE) version or
-Photo-Brush XTR plug-in version.
Please read what is the difference between Stand-Alone and XTR version.
|
Photo-Brush XTR plug-in, version ( 100 kB)
|
|
Read here how to install XTR Plug-In files.
|
| Stand-Alone version ( 380 kB) |
|
|
If
you like our tools, please put a link or banner to your site. Get
the graphics here.
To
see even more cool tools go to our home
page.
|
|

Method:
Simple Scientific - Pure Subtraction method. This could be good method if you need the scientific results - for example in astronomy or you don't like what the other methods are producing.
Stochastic Selective - This method uses the black frame plus the color information from the original image to remove HotPixels while eliminating the creation of black "holes"
Stochastic Selective 2 pass - This is like the method above (1st pass), then it go again trough whole image to smooth some problems.
 |
 |
 |
 |
| Original |
Black Frame |
Simple Scientific produces a "Black Hole". |
Stochastic Selective doesn't produce "Black Hole" |
 SS 2 pass + Purple fringing- This is like the 2 pass method above but it also removes a chunks of blue (purple) noise - much the same way as "Dark Night Shots" option in HotPixels applet. SS 2 pass + Purple fringing- This is like the 2 pass method above but it also removes a chunks of blue (purple) noise - much the same way as "Dark Night Shots" option in HotPixels applet.
When to use HotPixels applet and when BlackFrame NR ?
It is obvious that you can't use BlackFrame NR if you didn't take the "Black Frame" shot. So if you already have pictures with HotPixels the only way to remove them is to use HotPixels applet.
If you take the black frame shot (with lens cap on) during your night photo session then you can use BlackFrame NR (and of course HotPixels applet as well). This should produce better results.
How often I need to take Black Frame ?
If you taking a few shots in a row, you don't have to take Black Frame every time. The distribution of HotPixels should be the same during normal session.
Remember - as you use your camera in a session the temperature of CCD increases so the later shots would have more HotPixels than the earlier ones. The best is to take BlackFrame after the night shots.
If you have longer pause between shots it is wise to take Black Frame from time to time.
Can I use it for normal, not a night images?
No, because daylight pictures should not have visible Hot Pixels. It will NOT make your image less noisy. Try other tools like ClearSkinFX or DCEnhancer instead.
If your camera put white spot(s) on any picture you take (daylight or dark) then you may have Stuck Pixels - a pixel which doesn't work. You may want to return the camera.
|
