CREATIVE TOOLS FOR CREATIVE MINDS


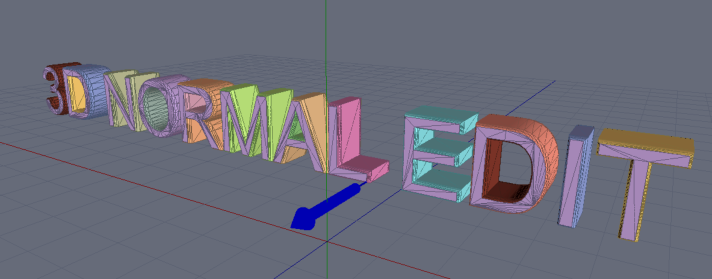
3D Normal Editor + Shading Domains
Version 0.4 (12/04/2018)

No installation,
just unzip and run
This is a little spare-time experimental project - a first entry into world of 3D
programming.
Most of the the functions it offers are scattered in various other big applications.
•
Load and save OBJ files
•
Display vertex normals
•
Detects multiple normals per vertex
•
Smooth, Un-smooth, Collapse and Add multiple Normals to vertices
•
Direct Normals UP (for foliage) or from center of object
•
Triangulate object
•
Set and assign shading normals to faces
3D Normals

Each Vertex in OBJ file have also a normal - this is a directional vector
telling a 3D application how it should shade the edge. In 3D world all
surface is approximated by triangular (or sometimes quad) faces and the
application doesn’t necessary know if we want to shade the surface as
smooth surface or in fact as angular faces as it is modelled.
Consider the image below
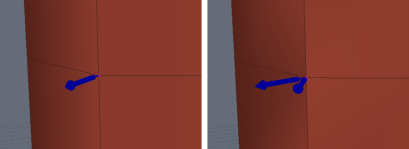
On the left side we have vertex where normal points outwards in combined direction of left and
right surface and this tells the 3d application that we likely want a smooth edge. On the right
side the vertex shows two normals, each is perpendicular to the surface it borders. And this tells
the 3d application that we would like to have a sharp edge or crease.
Now wait, before you start adjusting normals like there is no tomorrow!
This all applies to real-time graphics, such as games. Here the engine doesn’t have enough
time to do decisions about faces and it takes the normals as a hint what to do. But if you are
thinking about non-realtime rendering (for example Daz Studio) here the normals would not play
a role as the optical based rendering has set of different rules than real-time graphics - and most
notably; much more time to decide what to do with a surface so it can simply ignore normals.

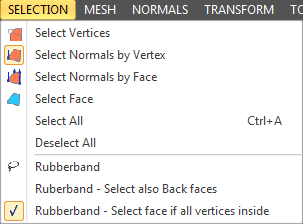
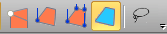
3D Normal Editor has few tools to select parts of the obect. they are also in the menu
Selection:
Select Vertices - select single or multiple vertices - not much use as
there is no vertex editing in the app (yet)
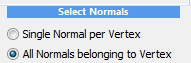
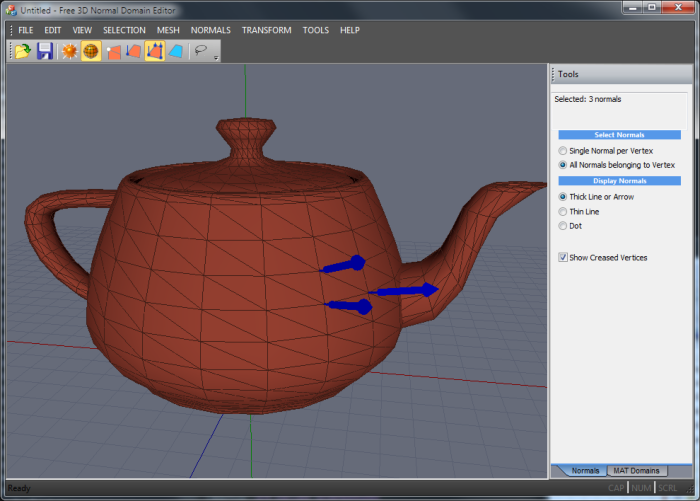
Select Normal by Vertex
Select a normal belonging to the vertex. A vertex can have more
than one normal so there is a setting in the right panel:
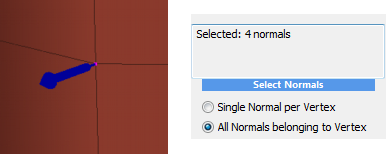
This settings will either select a single normal (depends on which face we
click) or all normals that belongs to the vertex (if there are multiple
normals). You should look also at the right panel text to see what you have selected, because multiple normals
can point in the same direction.
In this case it looks like we have one normal selected but
by looking at the right panel we see we have in fact 4
normals selected (pointing in the same
direction). So that means each face at the
vertex has also a normal. Since they all point
in the same direction, it is something we
may want to fix (and 3d Normal Edit can fix
this)
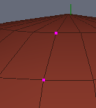
BTW. Multiple normals at a vertex are automatically
highlited by a pinkish dot
Select Normals by Face
Select all normals belonging to a face. So all Vertices on the face will have at least one normal, but as discussed
above can have more.
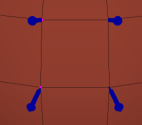

In this case clicking on a face will select all vertice
normals of that face, but in our case, we actually have
two vertices that have 4 normals and two vertices that
have just one so in fact we selected 10 normals.
As with the case before, this may happen on some objects, a vertex may have more than one normal but all of
them point in the same direction. It is redundant of course and we can Collaps the vertice normals into a single
Normal.
Select Face
This tool will just select a face - this is important for setting up Shade domains (later)
Rubberband
Select faces/vertices/normals using a laso selection. The setting “Select face if all vertices inside” tells what we
want to select on the borders of the laso tool. If checked only faces that are all inside in laso will be selected.
Select back faces - the laso can select either the faces you see or also faces on the back of the object
Selection Modifiers (works in all modes, including laso) SHIFT - add to the selection, CTRL - remove from the
selection
Mouse Control
Rotate around object - Hold ALT and left mouse button and drag (as in most 3d apps)
or click outside the object and drag (like in ZBrush)
Pan - Right click and drag
Zoom - Mouse wheel
Operation on selected normals
There is not yet tool to position a normal arbitrary - such as gizmo, so don’t look for one (TODO). You can
apply one of the operations on selected normals
Select Face
This tool will just select a face - this is important for setting up Shade domains (later)
Rubberband
Select faces/vertices/normals using a laso selection. The setting “Select face if all vertices inside” tells what
we want to select on the borders of the laso tool. If checked only faces that are all inside in laso will be
selected.
Select back faces - the laso can select either the faces you see or also faces on the back of the object
Selection Modifiers (works in all modes, including laso)
SHIFT - add to the selection
CTRL - remove from the selection
Select verices with Multiple Normals
Select all the vertices that have assigned more than one normal
Smooth Multiple Vertice Normals
If a vertex have multiple normals, this will all turn them to the
same average direction.
Unsmooth
This is the opposite - if vertex have multiple normals all turned to
the same direction, it will turn them each parallel to the adjacted
face normal. So in other words it will create crease.
Add multiple Normals to vertex.
So far the operations worked on multiple normals per vertex but
what if we have only a single normal - well, this will add multiple
normals to the vertex.
Collapse Multiple Normals
The opposite - it will delete all normals from the vertex, but keep
only a single one.
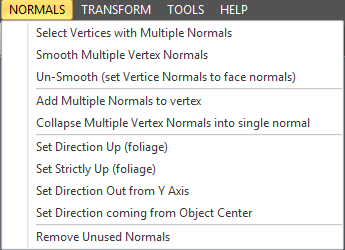
Set Direction
This will turn all selected normals into a certian direction.
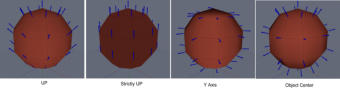
Direction UP - it will combine the current direction with an UP direction. For example for a 3d bush, foliage…
Strictly UP - all selected normals will point up and no other direction. Used for foliage, grass etc..
Out from Axis - all normals will become horizontal and their direction will be out from Y axis
From Object Center - all normals will be coming as if from object center. (for example a ball)
Remove Unused Normals - this will remove any remaining normals that are not used anymore and when you
save those normals will be gone.
if you don’t do that the normals will be saved even if they are no longer used on any of the vertices.
Shading Domains
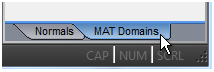

You need to switch to MAT domains tab and also select FACE
selector
A 3D object has asiigned a material in
any 3d application, for example a sphere
can be rendered as a marble by applying
marble texture. Another sphere can be
rendered as if made of wood by applying
different texture. But in fact the material
is not necessary domain of an object. It
can be in fact a property of one or more
faces.
In the draw bridge building on the left
(which appears as a single object) we
have 4 materials. Each of the colored
parts are UV mapped to completelly fill
the UV texture and then in rendering
application, each can have its own
texture file thus increasing quality.
This part of the software does just that -
assign multiple selected faces to a
material.
Working with this is very simple: select faces, select a material from the list, then press Assign Faces To
Material. If the OBJ file has no materials created, then first add one with Create New.

In this example I selected a top of the sphere with laso (and backfaces on), created new material, selected it
and assign the faces to it. Now all I need to do is to save the OBJ file and then import it in the 3d package of
choice.

Assign separate materials to any faces of the object.
Here in DAZ studio the saved sphere will appear with two shader materials and we can then select each to be
something else. And that’s it.
How do I un-assign faces?
Same way, select faces and assign it to _unassigned_ material.
How to delete whole shading domain?
Select the material, click “Select Faces by Material” which will select the faces, Select _Unassigned_ then press
Assign to Material.
How to delete the material from list?
You don’t and you don’t need to. Only materials with assigned faces will be saved. So a material with no
assigned faces will be ignored and not exported.
If you are going to render the 3d object in physical based rendering then adjusting
normals will have no effect.
TODO list
•
gizmo or control to adjust normals arbitrary
•
same for vertices

Automaticall y turns a photo into painting inspired by real world artists

Dynamic image editor and effect processor with absolutely unlimited possibilities

Cool new software for creating photo montages and compositions.


Enhance Dynamic Range of your images for Eye-Catching results
Dynamic Auto Painter
Photo Reactor
Photo Blend 3D
Dynamic Photo HDR

OUR COMMERCIAL APPS


About MediaChance
Products
Links