CREATIVE TOOLS FOR CREATIVE MINDS


Simple SignTool GUI for code signing certificates


No installation,
just unzip and run
Since many things have changed over the years, and now the code-signing certificate
is delivered on a USB stick, I created a small tool to help me code-sign files for
distribution.

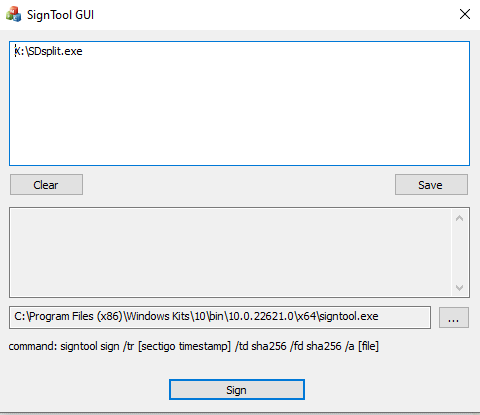
This tool essentially calls signtool.exe, adds a timestamp, and signs your .exe files.
But it comes with some handy bonus features:
•
Sign multiple files at once
•
Drag and drop .exe files into the window
•
Save the current file set to a .ksig file: Double-clicking a *.ksig file will
automatically open the SignTool GUI and pre-load the files that need to be
signed. For example, in my installation distribution folder, I have a .ksig file
containing all the files that need to be signed. I just double-click the .ksig file to
sign them.
•
Drag & drop the .ksig file to the GUI: This has the same effect as double-
clicking on it.
An Idiot’s Guide to Signing Files
To distribute .exe files, you should sign them, which will inform the end user that the files have not been tampered with and that they come from you. There are two types of code-signing certificates: OV (Organization Validation) and EV (Extended Validation). OV certificates are cheaper and easier to obtain, but they also trigger Microsoft's reputation check when downloading your signed files, which may display the message "FILE is not commonly downloaded and could harm your computer." This could scare your customers. EV certificates, on the other hand, are automatically recognized as approved by Microsoft Defender. (Note: Mediachance signs with an OV certificate.) Previously, certificates were downloadable as PFX files with a password, and there was a whole process involving only Internet Explorer and ordering the certificate from the machine where it would be installed. This is no longer the case, but many websites or YouTube videos still show this old method. You can no longer get downloadable PFX certificates. All certificates now reside on a “eToken,” a special USB drive that can be log on with a password. The certificate is then available for signing with the SignTool. It may sound more complicated than it is due to the use of various terms—I spent quite some time deciphering the process, only to find out that it’s actually very easy. When you order your OV certificate from resellers (e.g., Digicert, Sectigo, etc.), you will need to specify whether you want the eToken (a special USB key) shipped to you, or if you want to use your own hardware key to host the token. To keep it simple, the first time, you should have them ship you the eToken (USB key) for a slightly higher price, but you can likely reuse that key next time. The SafeNet eToken looks like a USB memory key with an ugly blue light at the top.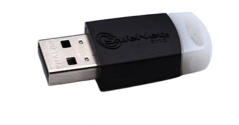
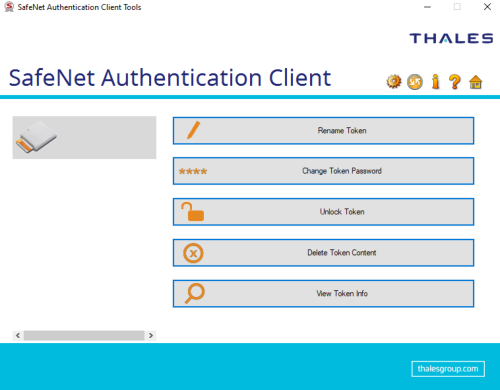
It’s really simple: Install the SafeNet Authentication Client (you don’t need the SafeNet drivers, as they are
already included), reboot your computer, then open the client and insert your special eToken USB key. It should
recognize the key automatically.
On the main screen, the only thing you should do is change the Token Password—don’t touch any other options.
Next, click on the gear icon (which is a rather poor choice for the "Advanced" view), and you should see a tree
structure with your token and its settings.
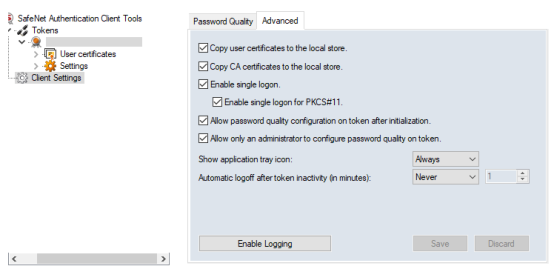
Next, we select Client Settings. Under the Advanced tab, I like to highlight Enable Single Logon and PKCS#11.
Why?
Once you log onto this eToken with your password—which should have been emailed to you by whomever sold
you the certificate—you can use SignTool on that computer without having to enter your password again until
you restart or remove the USB stick. This comes in super handy in cases where you'll need to sign several files.
To log on to the token, right-click on the token name—blank in the image above—and select Log On Token. The
second option, if you have selected Enable Single Logon, ensures subsequent uses of SignTool will no longer call
for the password.
Note: You only have 3 attempts to enter this password correctly, so make sure you enter the correct password.
If you were given the SafeNet eToken with your certificate already loaded from the Certificate Authority, you do
not have an Administrator password. For that reason, do not try to enter one; otherwise, you will be
permanently locked out of the token after 5 attempts. That admin password is only created at the time the USB
key is initialized—a format-like process.
Now, the rest is super simple: just code-sign your .exe files by using SignTool or the SignTool GUI.
There are no usable files on the drive, but it requires the SafeNet Authentication Client to work.
Important: While you might come across some slightly confusing videos on YouTube that suggest you need to
initialize the key when you receive it, that’s exactly what you don’t want to do. The initialization procedure is for
when you are adding a token to the device yourself, not when you purchase the USB key with the token already
installed.
Do NOT attempt the following operations under any circumstances:
Deleting Token Content
Importing a Certificate to a Token
Exporting a Certificate from a Token
Clearing a Default Certificate
Deleting a Certificate
Logging On to the Token as an Administrator
Changing the Administrator Password
Unlocking a Token by the Challenge-Response Method
Setting a Token Password by an Administrator
OUR COMMERCIAL APPS


Automaticall y turns a photo into painting inspired by real world artists

Dynamic image editor and effect processor with absolutely unlimited possibilities

Cool new software for creating photo montages and compositions.


Enhance Dynamic Range of your images for Eye-Catching results
Dynamic Auto Painter
Photo Reactor
Photo Blend 3D
Dynamic Photo HDR

Increase resolutions and details of your photos, art and 3D graphics using artificial intelligence.
Ai Photo & Art Enhancer


About MediaChance
Products
Links