


High Definition Workflow for Stable Diffusion
A Basic Overview of Creating High Resolution AI-Assisted Images
Generate a basic
resolution composition
(it can be also img2img
from your photo)
Enlarge using Extras in SD (or any
other method)
768 x 512
1536 x 1024
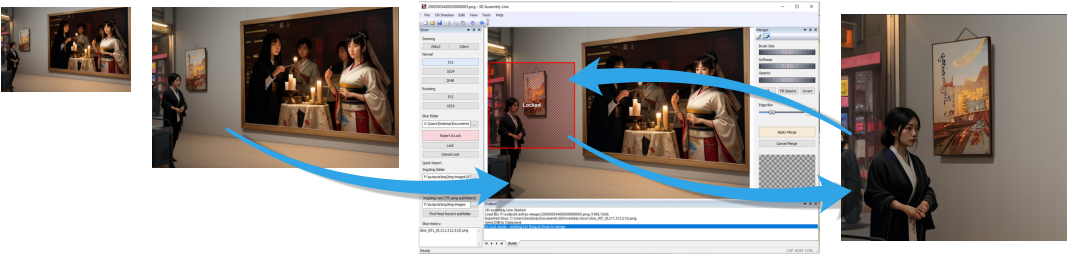
Load in SDA. Now find important area and you can
use Liquify or Painting tools then Export it as a slice
using Export & Lock.
Load the slice in SD and use
inpainting to fix areras of
interest. Now send back to
SDA to assemble it without
seams. Repeat.
The high-resolution workflow will begin with generating a composition at its base size (512), then progressively getting larger.
1536 x 1024
512 x 512
1536 x 1024
This way you can repeat the process of enlarging and refining, getting progressively more fine detail and resolution while you always work only on a
base resolution in the Stable Diffusion.
Detailed Step by Step
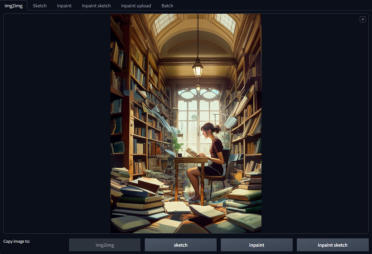


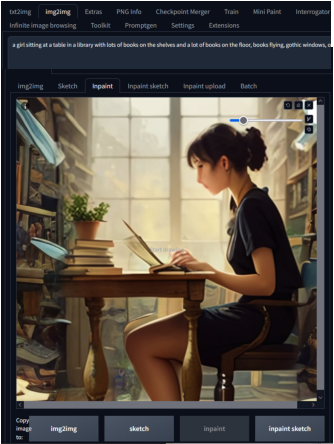


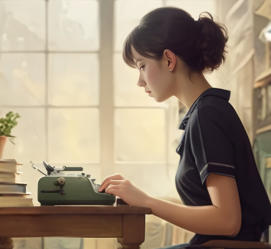
Create concept or use existing image:
The first step is to generate a base concept in Stable Diffusion without looking too closely at the
details. For me, I want a young woman in a very messy library, sitting at a table and typing on a
computer or typewriter (I'm still undecided about which). Such a concept image can be entirely
generated from a prompt, or using img2img and a photo reference or 3D rendering... anything that
helps to capture the exact concept. In this case, the dimensions were 512x745.
(The image can be further refined through inpainting if necessary, untill it is conceptually what you
want.)
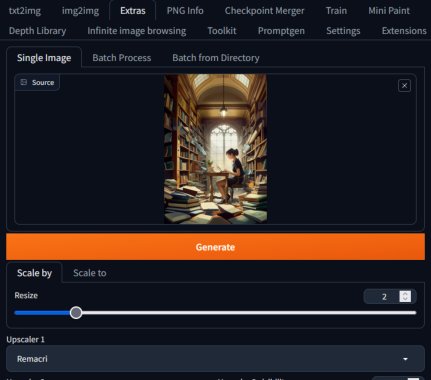
Once the concept image is what we wanted, we need to resize it 2x.
This can be done in multiple ways, but in this case I simply use the tab Extras where we can
send the image and scale it 2x using various Upscalers without changing it at all.
It is important to note that all the basic parts of the image should be already there where we
want them (such as windows, tables, the young woman sitting, bookshelves). It would be
much harder to add them at a higher resolution.
The result, in our case, will be an upsized image 1028 x 1490. This is our base image that we
will then refine.
Note: While at this resolution of 1028 x 1490 this workflow might not yet make full sense why
we need to slice the image outside Stable Diffusion, please keep reading, it will became more
clear once you start upscalling further and further.
If we look closely at the detail of this resized base image, it is the typical AI-
generated slop. With so many details, everything is pretty low-quality
when looking up close.
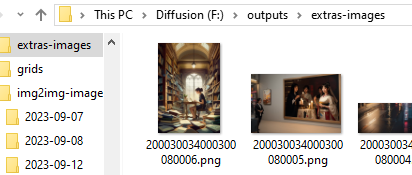
Tip: The upscaled images from the Extras tab are saved in my case to
F:\outputs\extras-images
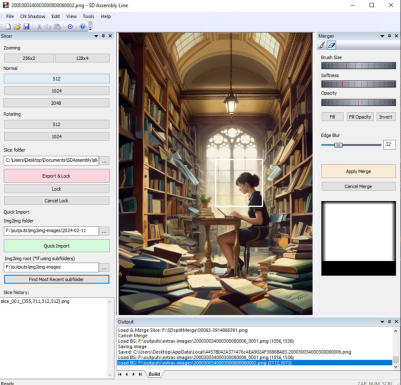
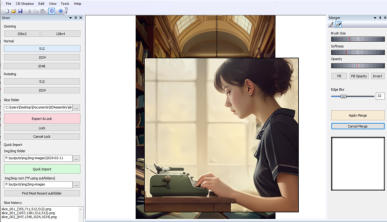
Now it's time to start using the SDA smart split and merge tools.
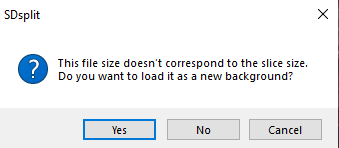
To do so, I need to open this 1028 x 1490 resized image in SDA (File: Open Main Image),
or simply drag it to the application if no image is opened yet.
The interface has a left and a right side.
The left side is for slicing the image, going to Stable Diffusion, and the right side is for
merging the Stable Diffusion processed slice back to Main image.
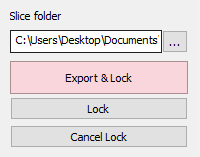
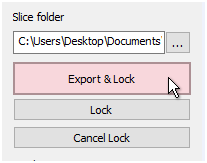
First let's set up where SDA will save the slices. It doesn't
matter what the folder is, as long as you know where it is :)
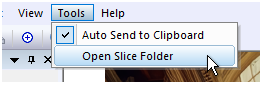
Tip: At any moment you can open the Slice Folder from the
menu Tools:
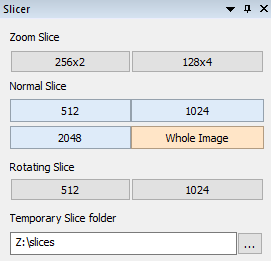
On the left side we have many Slicing tools. The base slice is 512 x 512 squares, which is what most Stable
Diffusion models work best with. (it can be changed in Tools/Settings to 768x768 if you prefer that)
You can also use the Rotating slice which you can rotate in any direction, allowing to align your image with the way
Stable Diffusion thinks it should be. This is especially important for anything that is turned less typically. (Such as
people or tools lying down etc, which Stable Diffusion will normally try to always correct the wrong way.
There is also the Zooming slice for small details that will first enlarge the slice so you working on it in Stable
Dissusion in better precision, and then shrink it back when importing and merging, making the result much crisper
and more detailed.
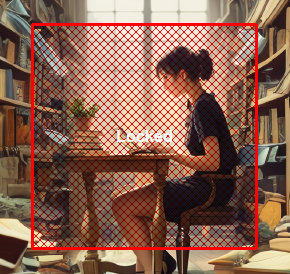
Once you click any of the Slicer buttons, the appropriately sized rectangle will appear on top of the image.
This is the slicer - a window that will be exported, so position it to the area you want to work with.
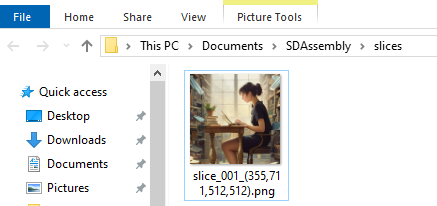
Now it's time to export the slice. Just hit the Export and Lock button and the
slice will be saved in the Slice folder as specified earlier.
The rectangle will be Locked in place so it cannot be moved any more. In this state, it is waiting for us to
return the Stable Diffusion inpainted slice so it can be merged back.
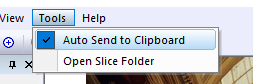
The slice has been exported, but also if you have Tools-Auto Send to Clipboard set to ON - it will be sent to
the clipboard.
We can either drag the file from the Slice Folder to the img2img inpaint window or in Automatic1111 and
Forge and a few other clones we can actually just paste it - when in inpaint tab, click on the inpainting
wwindow and just press Ctrl+V.
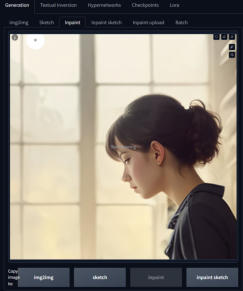
Now we can work on this slice the usual way - mask part of the image, describe it and generate.
Remember to set in Stable Dissusion: Resize mode to Crop and resize and Inpaint area to Only masked
Improve the slice using inpaint and when you are done, it's time to send the latest generated image
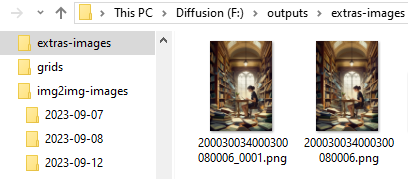
back to SDA. In my case I have Stable Diffusion set up so all inpainted images are saved in a date
subfolder under F:\outputs\img2img-images
To get the slice back to SDAssembly we can drag the latest
generated image (or any slice if you generated more variations)
over to the main window.
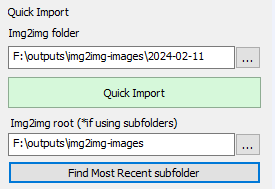
But a faster method is to setup the Quick Import.
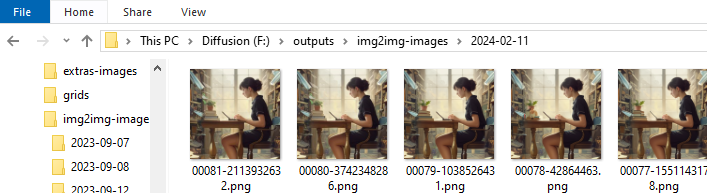
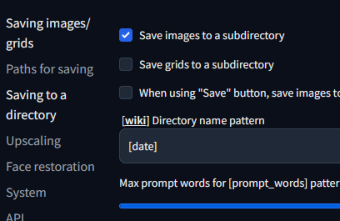
The Quick import needs to know where is the img2img folder. In
my case it is F:\outputs\img2img-images\2024-02-11 because I
have it setup so the images are saved in a subfolder by day to keep
them well organized.
This is set in SD Settings, Saving to a directory.
In such a case of subfolders, I can also set up Img2img root. The purpose of this setting is to find the subfolder where the last file was saved and fill it in
above the Quick Import Img2Img folder the next time you work with SD Assembly (for example next day or a week later).
So every day I use SDA, I don't have to browse for different subfolders, just click on the Find Most Recent subfolder and the latest path will be set in the
Img2Img folder (regardless of how it is named). If you don't use subfolders, then all you need to do is to fill the Img2Img folder (for example, C:\Stable-
Diffusion\outputs\img2img-images) above the Quick Import button and ignore the Img2Img root.
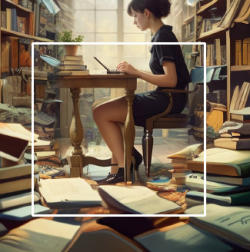
Once we click the Quick Import or drag and drop the processed slice from
img2img-images the slice will be merged with the base image and a blue frame will
appear around the entire image.
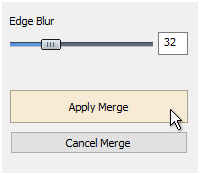
This signals we are in the Merge mode.
Merge mode is a mode where we can still adjust the blending of the new slice
before we Apply it. In most cases, nothing needs to be done; just press the yellow
Apply Merge button.
But in case you want to adjust the blending mask or the edge mask, this is the time
to do it. (for example mask out part of the slice)
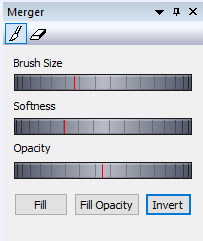
Before we hit Apply Merge, we can brush over the
blending mask. On the preview image the white
indicates where the NEW image will be fully visible and
black where it will be transparent and so the OLD
image from the background will be visible. This way
you can fix some discrepancies if you want to. This is
also a time when we can bail out and Cancel Merge.
After we hit the Apply Merge button, the merge will be concluded and
the composition image will be changed. This is where you can repeat the
process with a different area of the image.
When the image is as good as it gets given this resolution (our image is currently at 1028 x 1490 pixels), we can graduate to the next higher level.
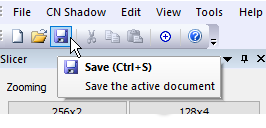
Tip: When you hit Save in SDA, the image will be saved to the same folder where the base image originally came
from. Since we dragged the background from F:\outputs\extras-images (see the top of this guide), this is where
the new merged image will be also saved. SDA will always make a new name, every time you hit the Save button
to keep versions.

This is where it starts to feel familiar. Now we have a 1028 x 1490 pixel file with much more
refined details.
And you can probably guess what follows next - Yes, resize this new image 2x again.
In Stable Diffusion Extras, we can drag in this newly saved file and do the same thing again.
Scale 2x using an Upscaler of our choice.
This will give us a 2056 x 2980 pixels file that we will then drag back to SDA and set as our
new background image. (Or just open it in File Open)
Since now the background is much larger, the 512 x 512 slice will look smaller. And this
way, we can improve the micro details and then resize the image again and again.
This is the basic principle of how you can create an incredibly detailed image with thousands of pixels of resolution comfortably without Stable Diffusion
standing in your way.
Tips
Before you load the slice into Stable Diffusion, you can add or remove things in Photoshop or another editor (for example, paint a crude hat on top
of the person's head and then use inpainting to turn it into a real hat). In my case, I can paste or draw a typewriter instead of a computer, then use
a prompt with the typewriter to correct the slice.
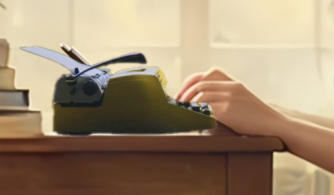
Crudely pasting an image of typewriter
After Impainting
When you work with large files, you can zoom under cursor to see details at 1:1 resolution using Magnify mode.

When in Magnify mode, wherever you click the slicing rectangle
will be placed around that area you see zoomed in.
Also, magnify works great in Merge mode when you are
painting a mask and you want to see the exact 1:1 result.

Stable Diffusion Preparation
Start with SD Assembly
Slicer
Export Slice
Inpaint Slice in Stable Diffusion
Import the Slice to SDA and Merge with the main image
Merge Mode and Optional Merge Mask
Save, Expand Image and Repeat
The following paragraph explains the base idea of using SDA to slice image from a much larger (Main) image, process only the smaller slice in the
Stable Diffusion and then Merge back. Optionally you can rotate the slice or zoom in on the slice to refine this process even further.
Resize Image (Upscale)
Rinse and Repeat
Going Further
The SDAssembly has also Liquify and Painting tools for complete workflow.

About MediaChance
Products
Links